
Home Electrical Ground Rod Inspection Cost in Minnesota
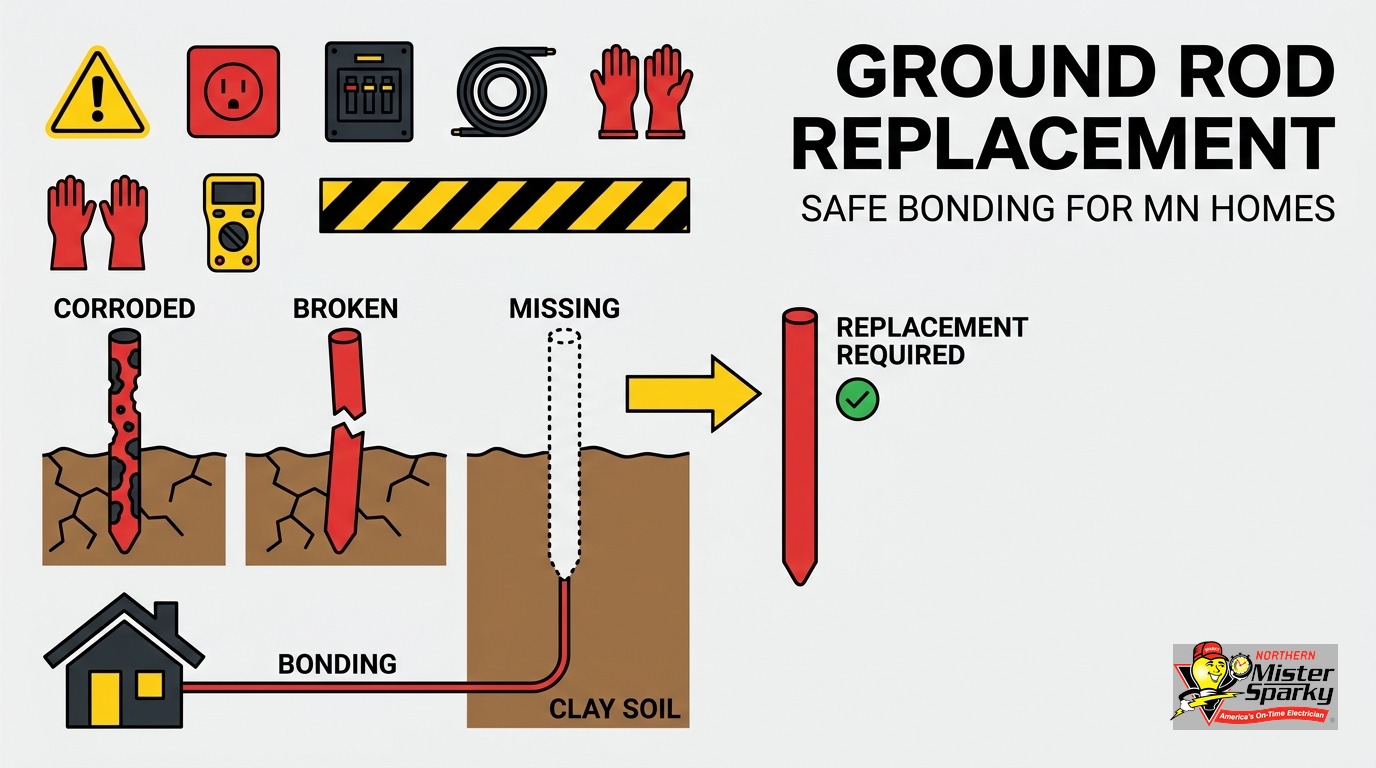
Key Takeaways
- Most Twin Cities homeowners have never looked at their ground rod. A failed electrode leaves the home without effective fault protection and gives no warning inside the house.
- Failure concentrates at the rod-to-clamp connection and the above-grade riser. Freeze-thaw cycles and Minnesota clay put direct mechanical stress on that joint every winter.
- A single rod testing above 25 ohms of earth resistance is a code violation. A second supplemental rod is then required, which changes the total cost significantly.
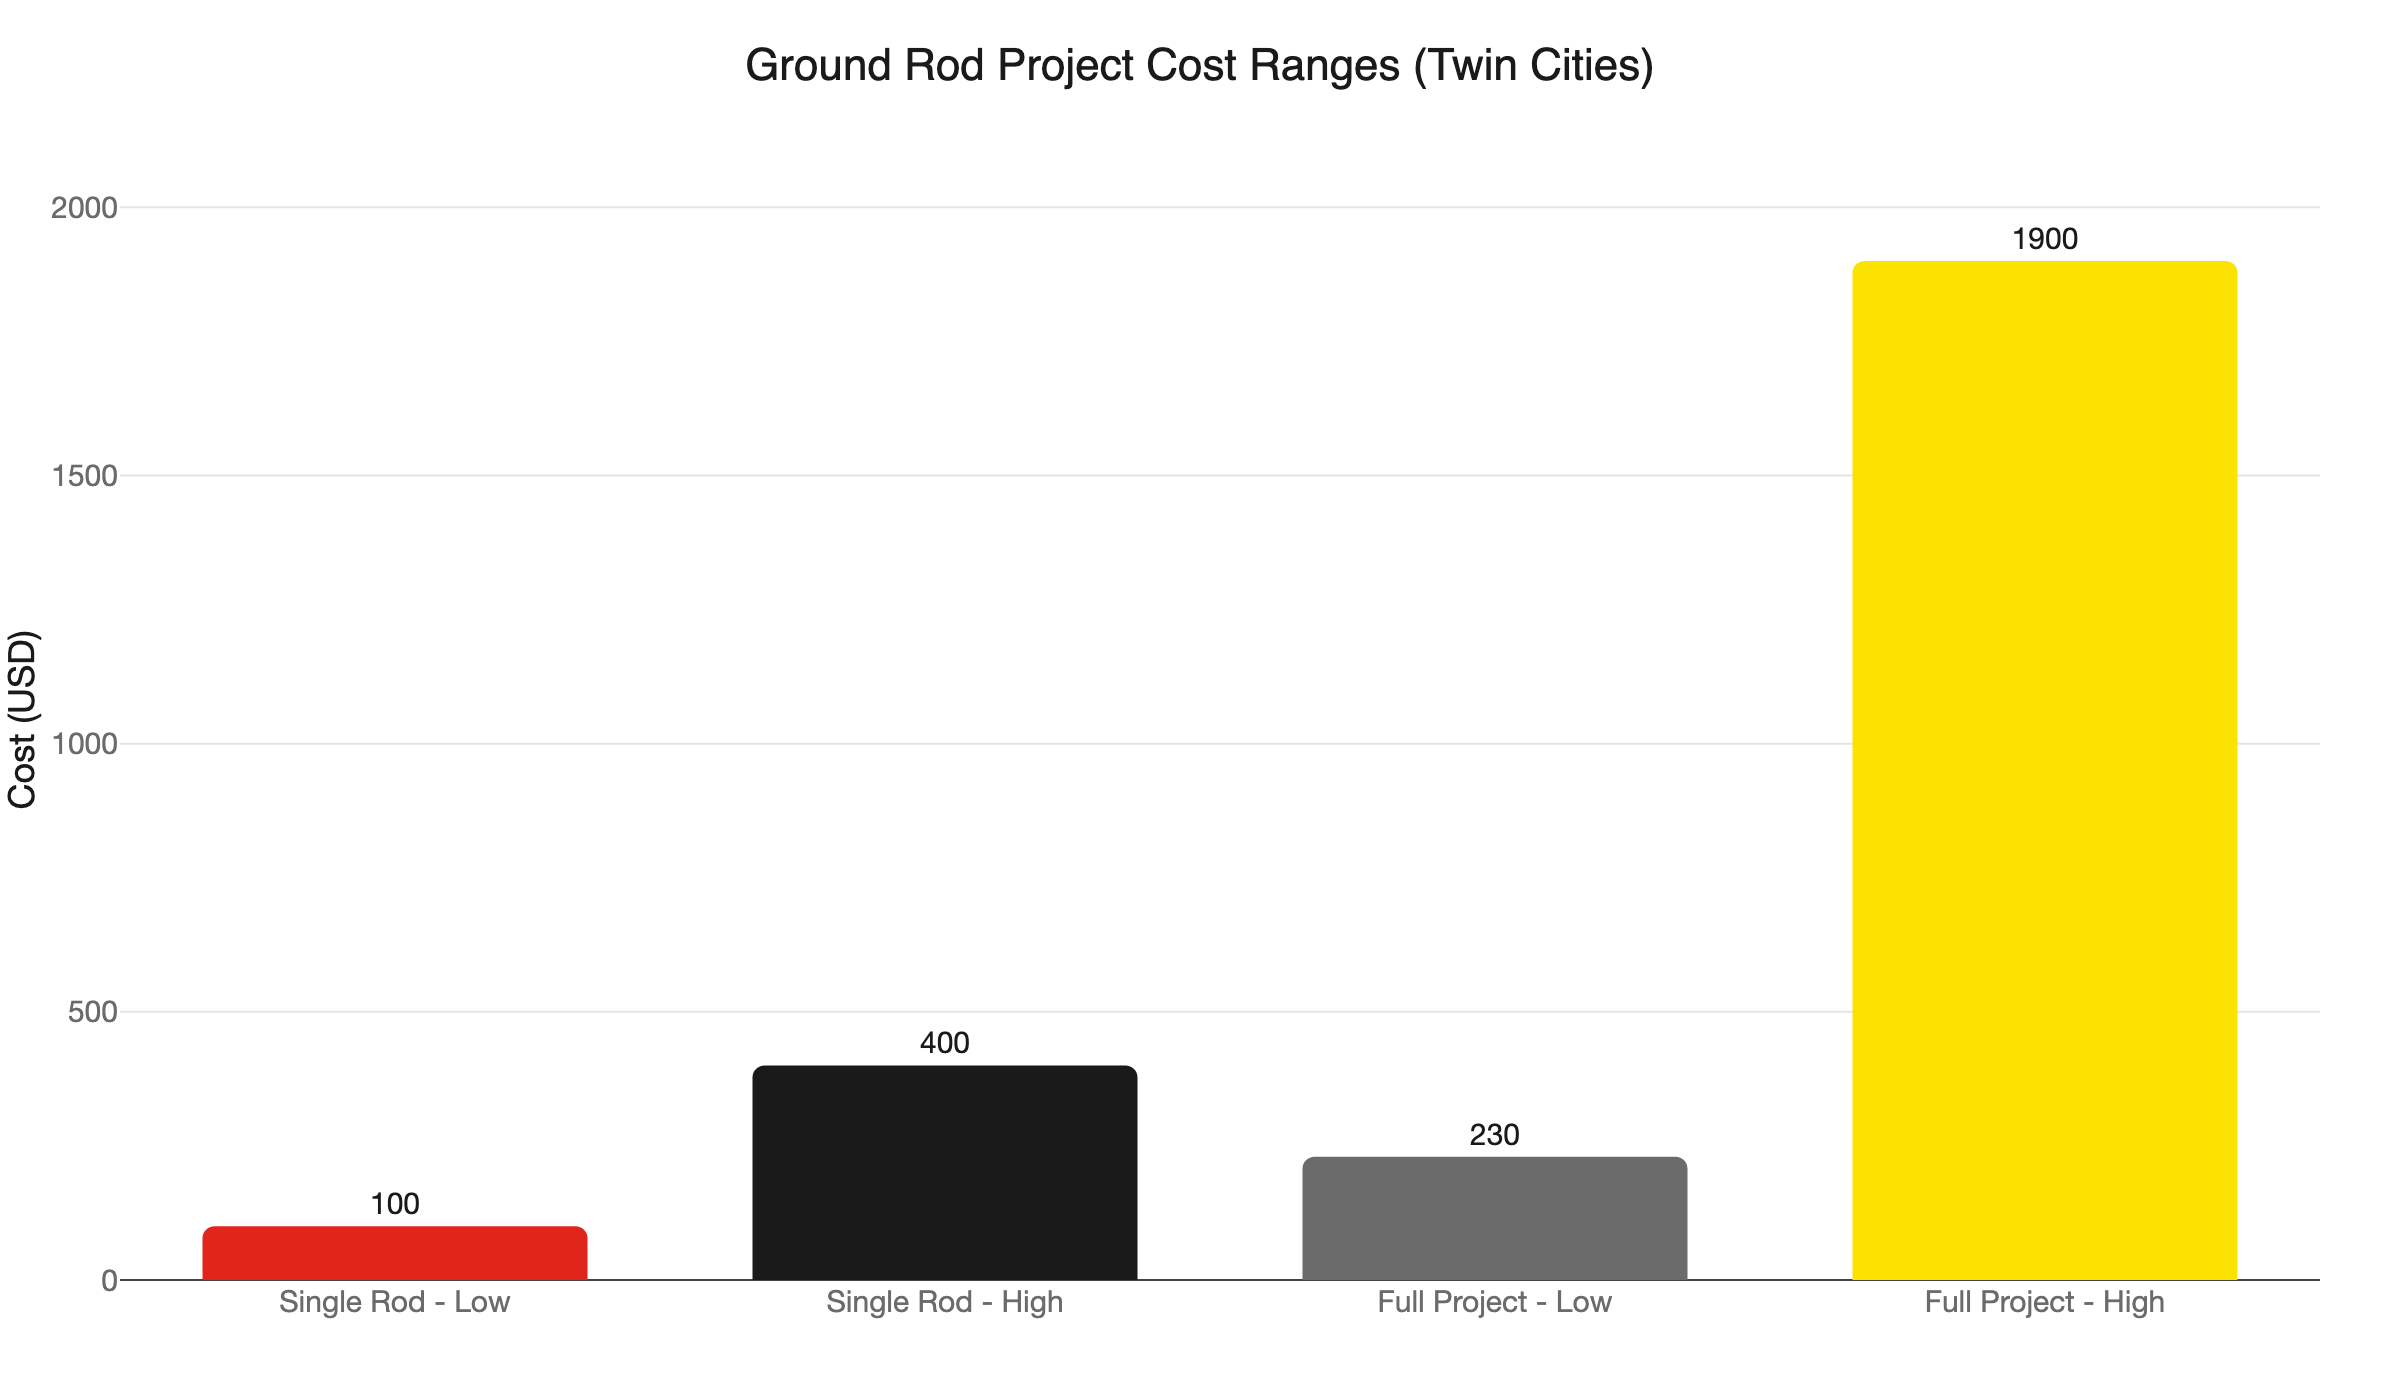
- Home electrical ground rod inspection cost: $100-$400 for a single rod replacement; $230-$1,900 for a full project with multiple rods, conductor work, and a DLI permit.
- Minnesota DLI requires a permit and final inspection for this work, even for licensed contractors.
- Call 763-200-5956 or book online to schedule a ground rod inspection with our locally owned Twin Cities team.
What Is a Ground Rod and Why Does It Matter?
Quick answer: A ground rod is a copper or copper-clad steel electrode driven into the earth beside your home. It provides a low-resistance path to ground so fault current can clear fast enough to trip a breaker and prevent shock or fire.
Every home has a grounding electrode system. The ground rod is the most common piece of that system. A bare copper grounding electrode conductor runs from your main panel down the exterior wall and terminates at a clamp that bites directly into the rod. The rod itself is at least 8 feet long, driven to an 8-foot depth per NEC 250.52(A)(5) and 250.53(G).
When a fault occurs inside the house, current needs somewhere safe to travel. If the path to earth is compromised, the fault may not generate enough current to trip the breaker. Instead, the fault point builds heat or maintains a persistent shock hazard. The ground rod is quiet and invisible, and it gives no warning when it fails. That is what makes periodic inspection worth doing.
A few other electrodes can be part of your grounding system. The metal water service pipe, a concrete-encased electrode in the foundation, and a ground ring are all options under NEC Article 250. But the ground rod is the one most homeowners can see and inspect. It also sits at the soil-air interface where corrosion is most active. For a broader picture of how the full system fits together, see electrical bonding and grounding explained.
If the grounding electrode system has never been checked on your home, a visual inspection of your electrical grounding system is a low-cost starting point.
What Does a Home Electrical Ground Rod Inspection Cost?
Quick answer: Single rod replacement typically runs $100-$400. A full project covering multiple rods, new conductor work, and a DLI permit ranges from $230 to $1,900. The biggest variable is whether a single rod passes the 25-ohm resistance test or requires a second supplemental electrode.
Electrician labor rates in the Twin Cities run $40-$125 per hour. Ground rod work is typically a half-day job or less when soil conditions cooperate. Rocky ground or dense clay that resists the drive rod adds time. If soil or rock prevents a vertical installation, code allows angling the rod up to 45 degrees. Horizontal installation in a trench at least 30 inches deep is also permitted when conditions require it. Both options add cost over a straightforward vertical drive.
The two-rod question has the biggest effect on the total. Many electricians install two rods from the start rather than testing a single rod and returning to add a second if it fails. The upfront cost of a second rod is modest. The cost of a second mobilization is not. If your home currently has one rod that has never been tested, there is a real chance it no longer meets the 25-ohm threshold after decades of Minnesota freeze-thaw cycles. An inspection tells you where you stand before the work begins.
A homeowner quoted $150 and one quoted $1,200 may both be getting fair prices, depending entirely on what the resistance test shows and how many rods the job requires. The inspection comes first, then the quote makes sense.
Permit fees add to the total. See the section below on the DLI permit requirement. For a broader look at how Minnesota permits work and what the fee schedule looks like, our post on electrical permits in Minnesota covers the full process.
What Does a Failing Ground Rod Look Like?
Quick answer: The most common signs are green or white corrosion on the clamp, a clamp mounted on a painted surface, or a rod you can spin freely by hand. You can check all three yourself before calling an electrician.
Your ground rod is usually visible near the electrical meter or at the point where service enters the building. Trace the bare copper wire running down the exterior wall. It should end at a clamp gripping the rod. Here is what failure looks like:
- Green or white oxidation on the clamp or conductor. That corrosion is resistive. A corroded clamp can look intact from a few feet away and still have no reliable conductivity at the metal contact.
- A clamp mounted on a painted or coated surface. The clamp must make bare metal-to-metal contact with the rod. Paint between the clamp and the rod breaks the electrical connection entirely.
- A rod that spins or wobbles when you touch it. A rod that rotates freely has lost its bond with the soil. It is not grounded.
- Pitting or flaking on the rod itself. Copper-clad rods corrode through the cladding over decades. Once the steel core is exposed in Minnesota clay, deterioration picks up speed.
- A conductor that pulls free at the clamp. If you can wiggle the grounding wire out of the connector with one hand, that connection is already gone.
Operational warning signs inside the house are less direct but worth noting. GFCI outlets that trip for no clear reason, a GFCI that will not reset, neutral-to-ground voltage at outlets, and unexplained breaker trips can all point toward a grounding problem. None is definitive on its own. Any combination of them, however, is a reason to have a licensed electrician inspect the grounding electrode system from the panel to the rod. The InspectApedia electrical grounding inspection guide documents the full evaluation checklist professional inspectors follow.
Why Does Minnesota’s Climate Make Ground Rod Problems Worse?
Quick answer: The Twin Cities frost depth reaches 42-48 inches. Every freeze-thaw cycle puts mechanical stress on the clamp and above-grade riser. Minnesota clay also swings widely in resistivity across seasons, so a rod passing the 25-ohm test in wet spring soil can fail after a dry summer.
Homeowners in moderate climates rarely deal with ground rod corrosion as a routine maintenance item. In Minnesota, the combination of frost heave and clay soil variability attacks the grounding system from two directions.
Freeze-thaw mechanical stress. The Twin Cities frost depth runs 42-48 inches, and each freeze-thaw cycle shifts the clay around the buried rod. The buried section of the rod stays relatively protected by the surrounding soil. The stress concentrates at the above-grade riser, where the conductor exits the ground and connects to the clamp. NEC 300.7 requires accommodation for ground movement on direct-buried conductors in areas subject to frost heave. Minnesota is exactly that kind of area, and the clamp-to-rod connection is the first place that stress shows up as a cracked conductor or a loose clamp.
Clay soil resistivity swings. Clay resistivity ranges from 1,000 to 25,000 ohm-cm, a band wide enough to mean the same rod can pass in one season and fail in another. Wet spring clay conducts well. That same clay dried out after a summer drought can push a marginal rod over the 25-ohm limit. The InterNACHI grounding electrode reference notes that ground enhancement material, such as bentonite or carbon-based GEM packed around the rod in high-resistivity soil, stabilizes conductivity across season changes. If your soil has historically tested at the margins, that is worth discussing.
What this looks like in practice. A rod installed in 1990 and never inspected may have worked fine through most of those years. After enough frost cycles, the clamp corrodes or loosens without any visible sign inside the house. The grounding system continues to look connected on paper while providing no effective path to earth. We see this pattern regularly across older homes in Minneapolis, St. Paul, and the inner-ring suburbs.
For related Minnesota-specific context on how soil depth and ground conditions affect direct-buried electrical work, see our post on how deep to bury electrical wire in Minnesota.
What Are the NEC Code Rules for Ground Rods?
Quick answer: A rod must be at least 8 feet long and driven to an 8-foot depth. A single rod must achieve 25 ohms or less earth resistance. If it fails, a second rod is required. Two rods must be spaced at least 6 feet apart, with 16 feet or more being optimal.
The National Electrical Code sets the floor for residential ground rod installations. Here is a plain-language summary of the rules most relevant to inspection and replacement work:
- Rod length: Minimum 8 feet per NEC 250.52(A)(5). A shorter rod does not satisfy the electrode requirement regardless of what the resistance test shows.
- Burial depth: The rod must be driven to a full 8-foot depth per NEC 250.53(G). Angled or horizontal installation is permitted only when rock prevents a vertical drive.
- The 25-ohm rule: A single rod must achieve 25 ohms or less resistance to earth. If it fails, a supplemental electrode is required per NEC 250.53(A)(2). The supplemental electrode is almost always a second rod.
- Two-rod spacing: Two rods must be spaced at least 6 feet apart. Optimal spacing is twice the rod length, or 16 feet or more, to keep their influence zones in the soil from overlapping. NEC 250.53(A)(3) defines this requirement.
- Why electricians install two rods upfront: Installing two rods from the start satisfies the supplemental electrode requirement without a resistance test. The cost of a second rod is small. The cost of a second service visit when the first rod fails the test is not.
- Aluminum conductors and galvanic corrosion: If your home uses aluminum grounding conductors, they cannot contact a copper rod directly. Galvanic corrosion at the contact point breaks the connection over time. A listed bimetallic connector is required.
Older Twin Cities homes are more likely to have aluminum conductors in the grounding system, particularly those built in the 1960s and 1970s. If you are not sure what material your grounding conductor is, that is one of the first things an inspection confirms.
Do You Need a Permit to Replace a Ground Rod in Minnesota?
Quick answer: Yes. Minnesota DLI requires a permit filed at or before work begins, even for licensed contractors. The work requires a final inspection before the conductor is energized. Licensed electricians handle permit filing as part of the job.
This surprises many homeowners. Replacing a ground rod feels like a minor exterior task, not a permitted electrical job. But in Minnesota, any work on the grounding electrode system is electrical work and falls under DLI jurisdiction.
Homeowners can legally perform electrical work on an owner-occupied single-family home. That DIY allowance does not exempt them from the permit requirement. A homeowner who replaces their own rod must still pull the permit, complete the work to code, and pass the DLI final inspection before the conductor is terminated at the panel. The Minnesota DLI homeowner electrical permit guide details exactly what owner-performed work requires and what the inspection process involves.
Permit fees for a single or two-rod replacement typically fall under $250. Permits in that fee range expire 12 months from the filing date. Budget this into your total project cost when comparing quotes.
DLI Electrical Unit contact: 443 Lafayette Road North, St. Paul, MN 55155; (651) 284-5026; dli.mn.gov.
Our licensed electricians file the permit before starting work and schedule the DLI inspection as part of the project. You do not coordinate that step separately.
What Happens During a Ground Rod Inspection?
Quick answer: A licensed electrician traces the grounding electrode conductor from the panel to the rod, checks the clamp and riser for corrosion and code compliance, tests earth resistance if the visual raises concerns, and verifies the installation meets current NEC requirements.
When our team performs a ground rod inspection, the visit covers:
Visual inspection. We trace the grounding electrode conductor from the exterior panel down to the rod. We check the clamp, the above-grade riser, and the visible rod for corrosion, physical damage, and code compliance. We verify the clamp is on bare metal rather than a painted surface, and that the conductor size matches your service size.
Resistance testing. If the installation is older or the visual inspection surfaces corrosion, we use a clamp-on or fall-of-potential meter to measure earth resistance. A reading above 25 ohms requires a second rod or ground enhancement work.
Code compliance check. We confirm rod length and depth, verify spacing between rods if two are present, check for a proper intersystem bonding termination for cable and telephone utility attachments, and note any conditions that do not meet current NEC requirements.
Panel connection review. We verify the conductor terminates correctly at the grounding bus bar in the main panel with a listed connector and that the connection is tight and free of corrosion.
If replacement or enhancement work is needed, we quote it before starting. We can often complete the work during the same visit after pulling the permit.
When Should You Schedule a Ground Rod Inspection?
Quick answer: Schedule if your home is 20 or more years old with no prior grounding inspection, if you see corrosion at the clamp or riser, if GFCI outlets are tripping without a clear cause, or if you are buying or selling the home. After a lightning strike, schedule immediately.
Most homeowners never schedule one. That is exactly why ground rod failure is as common as it is. A few specific situations should move this up your priority list:
- The home is 20 or more years old and the grounding system has never been inspected.
- You see corrosion, rust, or oxidation anywhere on the exterior conductor or clamp.
- GFCI outlets are tripping without a clear cause, or a GFCI will not reset.
- You are buying or selling the home. A failed ground rod is a real finding on an inspection report and can complicate a sale.
- The home experienced a lightning strike or major power surge. Both can damage the grounding system in ways not visible at the panel.
- Your home has aluminum wiring or aluminum grounding conductors. Galvanic corrosion risk is higher, and inspections should happen more frequently.
No malarky: a ground rod inspection and replacement costs a fraction of what panel or wiring damage from a compromised grounding system can cost over time.
Schedule Your Ground Rod Inspection in the Twin Cities
Ground rod problems do not announce themselves. They corrode silently and leave your home without effective fault protection for years before anyone notices. The home electrical ground rod inspection cost is modest relative to the risk that a failed electrode carries.
We are a locally owned and operated Twin Cities electrical contractor, backed by the Mister Sparky franchise and the UWIN(R) 100% satisfaction guarantee. Our licensed electricians serve Minneapolis, St. Paul, Bloomington, Brooklyn Park, Woodbury, Blaine, Maple Grove, Plymouth, and the surrounding metro.
Call 763-200-5956 or book online to get on the schedule. We are America’s On-Time Electrician(R). We show up when we say we will.
Frequently Asked Questions
How much does a home electrical ground rod inspection cost? +
How do I know if my ground rod has failed? +
Do I need a permit to replace a ground rod in Minnesota? +
Need an electrician now?