Convert 3-Prong Dryer Outlet to 4-Prong: MN Homeowner Guide
Key Takeaways
- New dryers ship with 4-prong cords because a 1996 code change required a dedicated ground wire on all new dryer circuits.
- The 3-to-4-prong adapter is not a safety solution. It changes the plug shape without adding a ground wire.
- The bonding strap inside the dryer is the step most DIYers miss. Getting it wrong in either direction creates a shock hazard.
- Most pre-1996 Twin Cities homes have 10/2 in-wall wiring (three conductors). Converting to a true 4-prong outlet means pulling new 10/3 wire from the panel - a permit job.
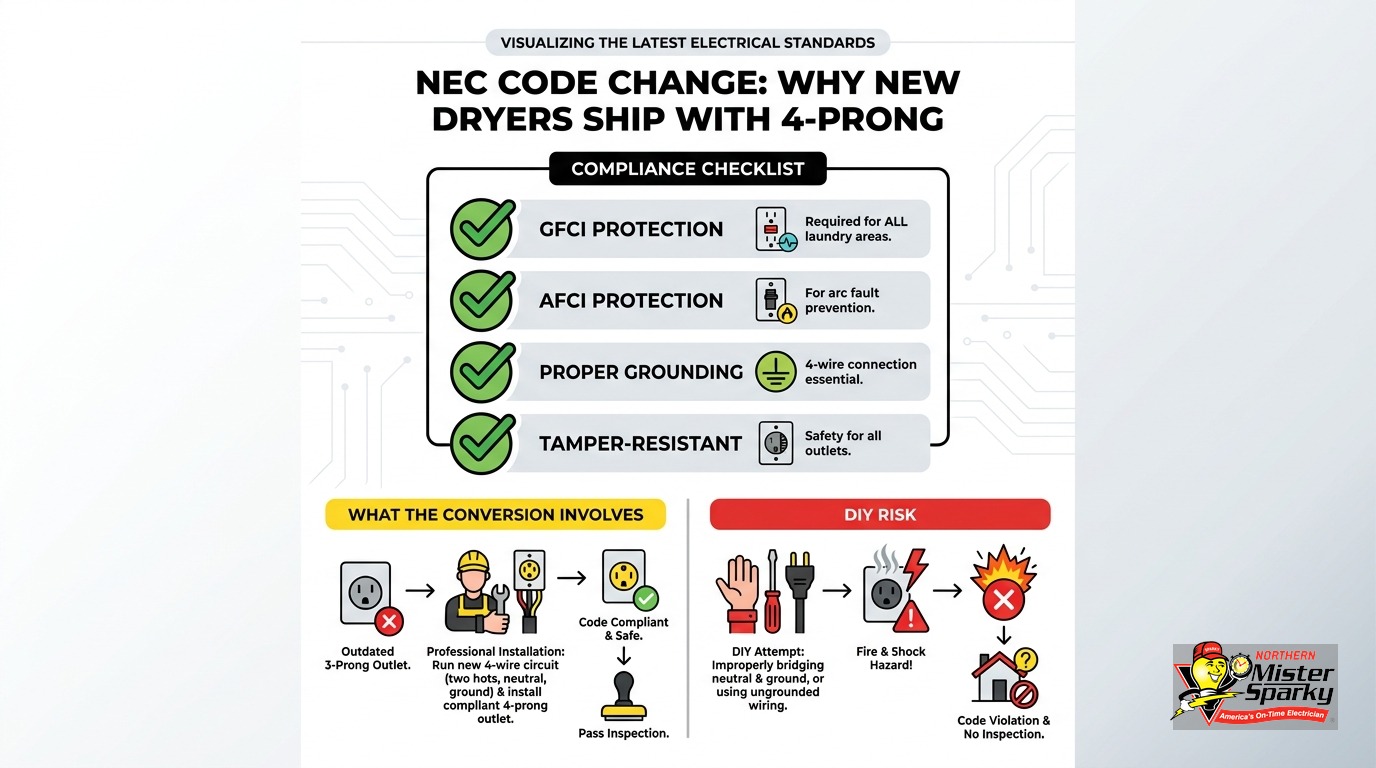
- Minnesota now requires GFCI protection on all new and modified dryer circuits under the 2023 NEC, effective through August 16, 2026. The 2026 NEC took effect August 17.
- A Minnesota homeowner can do this work on their own owner-occupied home with a permit. Rental properties are off limits.
- Call us at 763-200-5956 or book online to get a dryer outlet upgrade scheduled fast.
Why Did the 4-Prong Dryer Outlet Become the Standard?
Short answer: The 1996 NEC required a dedicated equipment grounding conductor on all new dryer circuits. Before that change, the neutral wire doubled as the ground path. If that neutral fails, 120 volts can appear on the dryer’s metal chassis and you become the return path.
Before 1996, a dryer’s metal frame was bonded to the neutral wire. That design works until the neutral wire breaks or corrodes at a connection. When it does, the chassis sits at 120V relative to ground. Touch it while standing on a damp floor and you complete the circuit.
The 1996 change, codified in NEC Article 250.140, required a fourth wire on all new dryer circuits: a dedicated equipment grounding conductor (EGC) that carries no current under normal operation. Under a fault, it provides a low-resistance return path that trips the breaker. You are no longer in the loop.
The result was two physically incompatible outlet shapes:
- NEMA 10-30R: The old three-slot outlet. Found in millions of pre-1996 Twin Cities homes.
- NEMA 14-30R: The four-slot outlet required on all new and replaced dryer circuits.
Appliance manufacturers ship dryers with 4-prong cords because new construction uses the 4-prong standard. If your new dryer has a 4-prong cord and your wall has a 3-prong outlet, that code gap is the reason.
The old outlet is not illegal. NEC 250.140 grandfathers it in place. You are not required to upgrade unless you replace or modify the circuit. But once you start the modification, the current rules apply.
What Is the Difference Between a NEMA 10-30R and a NEMA 14-30R?
Short answer: One wire. The NEMA 14-30R adds a dedicated equipment grounding conductor. Both outlets run 240V at 30 amps. The extra slot carries no load current - it exists solely to ground the dryer chassis and trip the breaker if something goes wrong.
The voltage and amperage are identical. Two 120V hot legs combine to power the heating element at 240V. The neutral serves the 120V motor and controls. What changes in the wiring is this:
| Wire | 3-Prong NEMA 10-30R | 4-Prong NEMA 14-30R |
|---|---|---|
| Hot leg 1 (black) | Yes | Yes |
| Hot leg 2 (red) | Yes | Yes |
| Neutral (white) | Yes - also serves as ground | Yes |
| Equipment ground (bare copper) | No | Yes |
The mechanical difference enforces the electrical one. A 4-prong cord cannot physically plug into a 3-prong outlet. Once the outlet is correct, you cannot accidentally mix them up.
Why the Adapter Is Not a Real Fix
Retailers sell 3-to-4-prong dryer adapters. Some listings call them the “easiest” option. They are not a fix.
The adapter changes the plug shape. It does not run a new wire. Your dryer chassis is still bonded to the neutral conductor inside the appliance. The neutral is still doing two jobs: carrying current and providing the only path to ground. That is exactly the condition the 1996 code was written to eliminate.
The adapter makes the setup look grounded. It is not. If the neutral fails anywhere in the circuit, the chassis can become energized. You are back to the pre-1996 safety problem, with the added danger that the outlet looks correct.
If your new dryer came with a 4-prong cord, two real options exist:
- Upgrade the outlet to NEMA 14-30R with a permit (details below).
- Swap the dryer’s 4-prong cord for a 3-prong cord rated for your existing outlet. Appliance manufacturers allow this. But you must also handle the bonding strap inside the dryer correctly - and that step is where most DIYers go wrong.
Option 1 is the right long-term answer. Option 2 is acceptable only if done correctly and if the existing outlet and wiring are sound.
What Does Converting a 3-Prong Dryer Outlet to 4-Prong Actually Involve?
Short answer: It depends on the wire already in your wall. If 10/3 cable (four conductors) already runs from your panel to the outlet, the job is a contained outlet swap. If you have 10/2 cable (three conductors), you need to pull new wire - and that is where most of the labor and cost comes from.
Most Twin Cities homes built before 1996 have 10/2 cable running to the dryer location. That is three conductors: black, red, and white. There is no bare copper equipment ground in the wall.
Here is how the scope breaks down by scenario:
Scenario A: 10/3 wire already in the wall
A 10/3 cable has four conductors - black (hot), red (hot), white (neutral), and bare copper (ground). If this already exists, the outlet upgrade is a shorter job:
- Shut off the 30A double-pole dryer breaker at the panel.
- Verify power is off with a non-contact voltage tester.
- Remove the NEMA 10-30R outlet.
- Connect the bare copper to the ground terminal on the new NEMA 14-30R.
- Install GFCI protection (required for modified dryer circuits under current Minnesota code - see below).
- Handle the bonding strap inside the dryer.
- Pull a permit and schedule the inspection.
Labor typically runs a few hours, including the inspection visit.
Scenario B: 10/2 wire in the wall
A 10/2 cable has only three conductors. There is no fourth wire to connect to the ground terminal of the new outlet. You cannot reuse the white neutral as a ground - that creates the same bonded neutral-and-chassis condition you are trying to fix.
The only correct solution is to pull new 10/3 NM-B cable from the panel to the dryer location. That means opening walls, running wire through framing or down from the basement panel, and landing a new circuit at the breaker. This is a permit job. It is also where most of the cost lives.
For homes with a finished laundry room and a distant panel, this work can span several hours. Our team checks the wire in the wall before quoting, so you know the real scope before we start. See our overview of 240V outlet installation for dryers and ranges for more on what this type of project involves.
The Bonding Strap: The Step That Catches DIYers Off Guard
Inside every clothes dryer, near the terminal block behind the rear access panel, is a bonding strap. It is a short metal jumper, tab, or wire that connects the neutral terminal to the dryer’s metal frame.
This strap is position-dependent:
- 3-prong setup: The strap must be in place. The neutral is the only path to ground. The strap keeps the chassis at neutral potential so touching it does not shock you.
- 4-prong setup: The strap must be removed. A dedicated EGC now grounds the chassis through the fourth wire. If the strap stays installed, you have tied the neutral to the chassis in a circuit that already has a real ground. Under a neutral fault, current can flow through the chassis - and through anyone touching the dryer.
The bonding strap is the most commonly missed step in dryer cord conversions. The dryer runs correctly in either case. Nothing trips. Nothing sounds an alarm. The hazard surfaces only when something else goes wrong.
The reverse failure is equally serious. Going from a 4-prong cord back to a 3-prong cord without installing the strap leaves the chassis floating. Touch the dryer and a grounded surface at the same time, and you may complete a circuit.
Strap location varies by manufacturer. Most models use a green wire, a metal tab, or a spade connector near the terminal block. Check the installation manual for your specific dryer model before opening the back panel.
Does Your Dryer Circuit Now Require GFCI Protection in Minnesota?
Short answer: Yes, if the circuit is new or modified. The 2023 NEC expanded GFCI protection to include clothes dryers. Minnesota adopted the 2023 NEC for permits filed through August 16, 2026. The 2026 NEC took over on August 17 - so electricians pulling dryer permits in the Twin Cities today are working under new code.
This changes what used to be a simple outlet swap. The Minnesota 2023 NEC inspection checklist confirms that GFCI protection is required on new and modified dryer circuits. The inspector will check for it. If it is missing, the job fails.
GFCI protection for a 240V, 30A dryer circuit is not a standard bathroom GFCI outlet. You need one of these:
- A 2-pole, 30A GFCI circuit breaker installed at the panel in place of the standard double-pole breaker.
- A 30A, 240V GFCI receptacle at the outlet location.
The GFCI breaker option is more common and often cleaner. Either adds material cost and requires your electrician to spec the right component for the jurisdiction’s inspection requirements.
Most DIY articles and competitor guides do not mention this requirement. It is one of the reasons an outlet swap that looks straightforward on paper can involve more scope and cost than expected.
For more on where GFCI protection is required throughout your home, see our guide to GFCI outlet requirements explained.
Do You Need a Permit in Minnesota to Convert a Dryer Outlet?
Short answer: Yes, in almost every real-world case. If the job involves pulling new wire or touching the panel, it requires a permit and inspection. Only a true like-for-like outlet swap at the same location - with the same wire already in place and no GFCI requirement triggered - might qualify as a minor repair. That scenario is uncommon.
Minnesota requires a permit for any new circuit, new outlet, or new switch. The permit triggers an inspection. Inspections in the Twin Cities are handled by:
- City inspection departments: St. Paul, Plymouth, Maple Grove, and a handful of other municipalities run their own programs. Check with your city’s building department before pulling a permit.
- MN DLI: For everyone outside those cities, permits go through the state’s online system at ims.dli.mn.gov.
Skipping the permit has real consequences. An uninspected wiring change that later causes a fire may complicate your homeowner’s insurance claim. The permit creates a record that the work was done and passed inspection. It also protects the next buyer when you sell.
For the complete picture on what triggers a permit in Minnesota and how to pull one, see our post on electrical permits in Minnesota.
Can a Minnesota Homeowner DIY a Dryer Outlet Conversion?
Short answer: Yes, under specific conditions. Minnesota allows a homeowner to do electrical work on their own owner-occupied single-family home, with a permit and inspection. A licensed inspector must sign off. A licensed electrician is not required - but the inspector is.
Three situations disqualify you from the homeowner exemption:
- The property is a rental. Minnesota does not allow owner-DIY electrical work on non-owner-occupied properties. No exceptions.
- A contractor is doing the work. If a licensed electrician touches the circuit, they pull their own permit. The homeowner exemption is for the homeowner’s own hands only.
- You are not the owner-occupant. The exemption is specific to someone who both owns and lives in the home.
Source: Minnesota homeowner electrical permit rules
Even if you qualify, be realistic about the scope. Scenario A (10/3 already in the wall, outlet swap plus GFCI device) is a manageable DIY project for a careful, permit-pulling homeowner. Scenario B (pulling new wire through finished walls, landing a new circuit at the panel, installing a GFCI breaker) is a different level of work. The inspection will catch mistakes - but only after the walls are potentially closed up again.
If there is any doubt about the wire in your wall, or if the property is a rental, hire a licensed electrician. Doing it right once costs less than redoing it after a failed inspection or a damage claim.
What Happens When This Goes Wrong
A dryer circuit wired incorrectly does not always fail immediately. That silence is part of the danger.
The bonding strap left installed on a 4-prong circuit can energize the dryer chassis under a neutral fault. The dryer runs normally. Nothing trips. The hazard only surfaces when someone touches the chassis and a grounded surface at the same time.
A 4-prong outlet retrofitted onto old 10/2 wire - without pulling a true ground conductor - means the ground slot is either floating or improperly connected. The outlet looks correct. The dryer works. The safety benefit of the upgrade is missing.
A modified dryer circuit without GFCI protection fails Minnesota’s current inspection standard. If the heating element develops a ground fault, the protection the code now mandates is absent. A standard 30A breaker may not respond fast enough to prevent injury.
These are not fringe scenarios. They are the exact failure modes that drove the NEC changes in 1996 and again in 2023. Getting the outlet shape right is only the first step.
Ready to Convert Your Dryer Outlet?
This is a straightforward job for a licensed electrician who has done it hundreds of times. For our team, it is a half-day project with a clear outcome: a properly grounded, GFCI-protected dryer circuit with a permit on file and an inspection passed.
We are locally owned and operated in the Twin Cities. We show up in the window we give you - that is the America’s On-Time Electrician(R) promise - and we back every job with our UWIN(R) 100% satisfaction guarantee.
If this project involves a panel assessment or a larger circuit evaluation, we handle that in the same visit. See our outlet installation service for details on what we cover and how we scope the job before we start.
Call 763-200-5956 or book online. We will get you scheduled fast.
Frequently Asked Questions
Is a 3-to-4-prong dryer adapter safe? +
Do you need a permit to upgrade a dryer outlet in Minnesota? +
Can a Minnesota homeowner legally do their own dryer outlet wiring? +
Need an electrician now?