
Home Intercom Wiring Installation: What to Know First
Key Takeaways
- Most Twin Cities homes built from the 1960s through 1985 have NuTone or M&S Systems intercom wiring already in the walls.
- Wire count determines retrofit compatibility: 3-wire and 4-wire systems often carry over cleanly; 6-wire and 8-wire systems are harder to match with modern equipment.
- The master station connects to 120V household power. That transformer can still carry dangerous voltage even if the system has been dead for years.
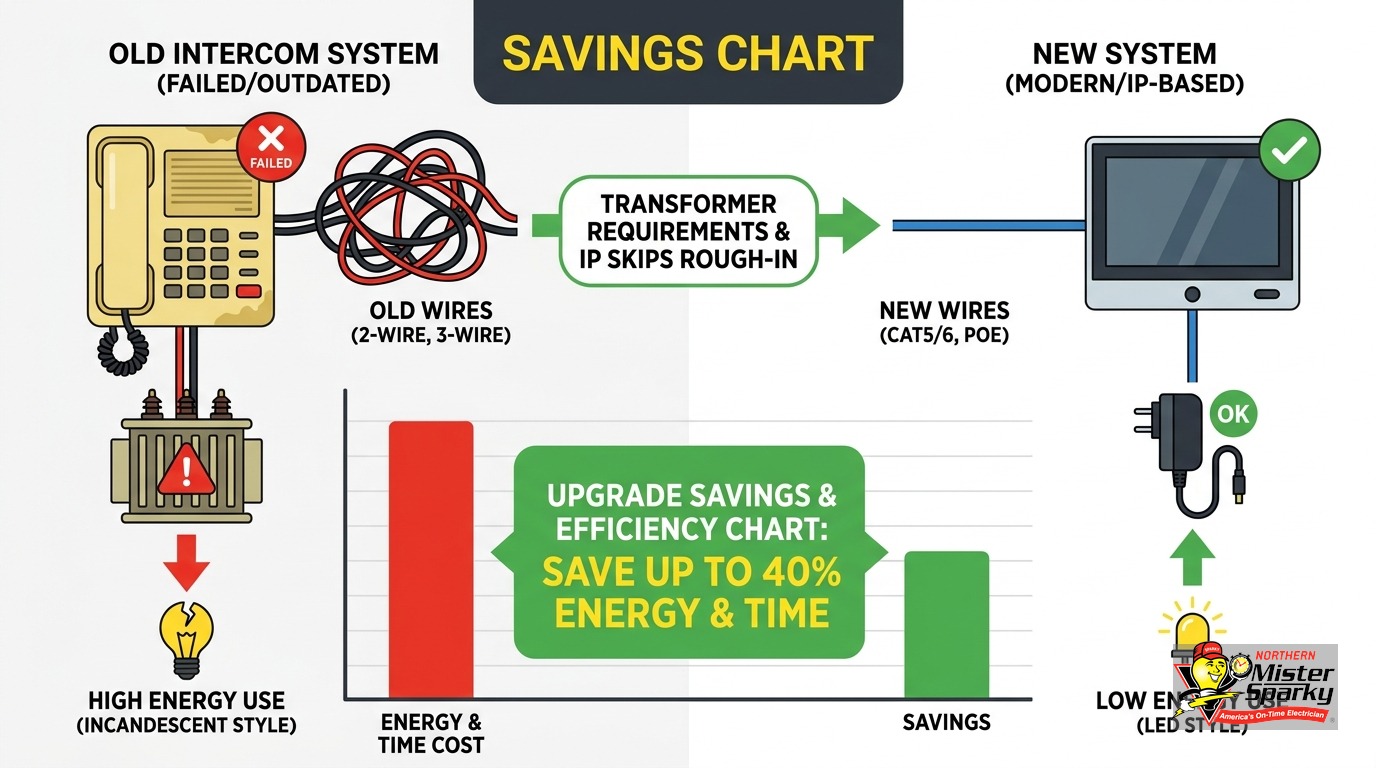
- IP-based systems like the Aiphone IPW-1VC can carry power and data over existing 2-conductor wire, skipping new low-voltage rough-in entirely.
- Minnesota requires a Power Limited Technician (PLT) license for new Class 2 intercom wiring. The 120V supply connection requires a licensed electrician.
- Battery WiFi models are completely wire-free and involve no permit work at all.
- Any permit pulled in Minnesota today must comply with the 2026 NEC, adopted August 17, 2026.
What does home intercom wiring installation actually involve?
The short answer: Installation means running low-voltage cable between a master station and room substations, connecting a transformer to the 120V household supply, and testing each station. Whether you reuse existing wires or run new ones depends on your home’s wire count and condition. The 120V supply connection always requires a licensed electrician in Minnesota.
A standard wired intercom system has three parts. First, a master station: the central control unit, usually flush-mounted in the kitchen or a main hallway. Second, room substations: the smaller speakers and call buttons mounted in individual rooms. Third, a transformer that steps 120V household current down to the low voltage the system runs on.
The master station is the only component that connects to your home’s 120V wiring. Substations receive their power through the intercom cable itself, not through a separate outlet. That matters before you pull anything apart, because the master station location carries line voltage even when the intercom appears completely dead.
For a new installation in a home with no existing wiring, the job includes a low-voltage rough-in pass: drilling through top plates and wall cavities, fishing cable, and routing it back to the master station location. For a retrofit of an existing system, the electrician first tests whether the current wires can carry a new system. That wire-count test is where most projects live or die.
How can you tell what wires your vintage system uses?
The short answer: Pull the cover off any substation and count the conductors. The wire count identifies which era your system is from and what modern equipment it accepts. Three-wire and 4-wire systems cover most Twin Cities homes from the late 1960s through the mid-1990s and have the widest retrofit compatibility.
NuTone’s intercom replacement guidance spells out the wire types and what each one accepts. Most NuTone homes use 18-22 AWG 2- or 4-conductor wire that is compatible with modern IST retrofit stations. Here is what the conductor count tells you about your home:
3-wire solid-state systems (1966-1994+) These use 22 AWG 3-conductor flat ribbon cable (NuTone part number IWA-3). This is the most common configuration in Twin Cities 1970s-1980s ranch homes. Modern IST retrofit stations accept this wire. The maximum speaker run is 300 feet per station, with a 2,000-foot system-wide limit.
4-wire systems (various late models) These use 22 AWG 2-conductor twisted pair or 18 AWG 2-conductor cable depending on the specific model run. Also compatible with modern retrofit stations.
6-wire systems (1975-1995) Models IM406 and IM4006 used flat IW6R ribbon with crimped connectors. Retrofit options narrow here because fewer modern systems use a 6-conductor layout.
8-wire loop-wired systems (1957-1974 and 1975-1983) Models N2561 and N2562 used 8-conductor wiring from 1957 to 1974. Models I600 and SM428 returned to 8-wire from 1975 to 1983. These are the hardest to retrofit with off-the-shelf gear. The IP bypass path described later in this post is often the better option.
If the model number is worn off the master station face, the wire count at any substation tells you the same thing.
What voltage is hiding inside your old master station?
The short answer: The master station connects to 120V household current. An internal transformer steps that down to power the intercom circuit, often to 12-40V AC depending on the system. Even a unit that has been dead for years may still carry 120V at the master station’s power connection. Treat it as live until an electrician confirms otherwise.
Most homeowners assume a dead intercom is safe to handle. It often is not. Some vintage transformers step 120V down to 40V AC to supply the master station. That output voltage is still enough to deliver a painful shock. The 120V feed going into the transformer is a live branch circuit regardless of whether the intercom works.
A modern retrofit power supply needs at least 12V DC at 500 mA to run a replacement system. If the existing transformer failed and needs replacement, that 120V supply connection is the electrician’s work.
This is the same reason replacing a doorbell transformer requires the same caution: the low-voltage output looks harmless, but the feed coming in is live household current. Age does not mean de-energized.
How difficult is the electrical wiring during installation?
The short answer: Difficulty ranges from minimal (battery WiFi) to moderate (retrofit on existing cable) to a full rough-in job (new wiring through finished walls). The hardest part of any wired intercom installation in an existing home is not the intercom itself. It is fishing cable through finished walls without opening them up.
For a retrofit using existing wires in good condition, the work is straightforward. A technician connects the new master station and substations to the existing cable, pairs the transformer, and tests each station. Most homes are done in an afternoon.
For new wiring in a finished home, the job expands. Drilling through top plates, running cable through wall cavities, and fishing through insulated spaces adds significant time. Older Twin Cities homes with plaster-and-lath construction are particularly slow because plaster resists drill bits and fishing snags constantly on the lath strapping.
That rough-in challenge is one reason IP-based systems have become attractive for existing homes. They eliminate or dramatically reduce the new cable runs, as the next section covers.
For context on how low-voltage rough-in plays out in finished construction more broadly, our post on hardwired security camera installation covers the same fishing and planning considerations for camera runs.
The IP path that skips low-voltage rough-in
Not every intercom replacement requires pulling new cable through your walls. IP-based systems offer a path that reuses the copper already there.
The Aiphone IPW-1VC is a PoE-to-2-wire converter. It runs over existing 22-18 AWG conductors up to 1,000 feet, shielded or unshielded. Pair it with a surface-mount IP video door station like the Aiphone IX-DV. Together, they replace an entire vintage NuTone system without pulling a single foot of new low-voltage cable.
This path requires a PoE switch or PoE injector at the master station location. That switch still needs a 120V outlet nearby, but adding one outlet is far simpler than re-running cable through every room in the house.
One Minnesota-specific note: any PoE injector or ethernet adapter installed outdoors, or in an unheated chase that feeds an exterior door station, needs to be rated for extended temperature operation. Twin Cities winters regularly reach -30 degrees Fahrenheit. A consumer-grade PoE injector in a cold space will fail by February. Either use an extended-temperature-rated unit or locate it inside a conditioned space and run only the cable outdoors.
There is also a completely wireless option. Battery-powered WiFi intercoms have no wiring scope at all. No transformer, no Class 2 rough-in, no PLT or electrician work involved. Signal quality at the front door is the only technical consideration. This is the right path for renters, for homeowners who do not want to open walls, and for anyone who wants a video doorbell camera without any construction.
If you are thinking about integrating a new intercom with broader smart home control, our overview of smart lighting control system wiring covers how that IP infrastructure fits together across a home.
Can an electrician fix or replace an intercom?
The short answer: Yes. Electricians handle the 120V transformer connection, new low-voltage rough-in if needed, and cable termination at each station. For the low-voltage wiring itself, Minnesota requires a PLT license. Our team at Northern Mister Sparky covers both sides of the job for Twin Cities homeowners.
We diagnose dead NuTone systems, test existing wire for reusability, run new cable where needed, and connect the 120V supply side correctly. What falls outside electrical scope: network switch configuration for IP-based systems (that is AV or IT contractor territory) and app programming for smart home platforms that integrate with modern intercoms.
On the DIY question: homeowners in owner-occupied single-family homes in Minnesota can pull their own permit and do their own low-voltage work, but the work must pass inspection. The 120V supply connection is not covered by that homeowner exemption. A licensed electrician must make that connection. If your vintage master station’s transformer died and you need a new 120V circuit or a new connection to an existing circuit, that is not a DIY task under Minnesota law.
The same line applies to smart doorbell installs that require a new low-voltage circuit from scratch. Our post on wiring a smart doorbell with no existing doorbell covers that specific scenario in detail.
Do you need a permit for intercom wiring in Minnesota?
The short answer: Usually yes, for any new wiring run. Minnesota requires a PLT license for Class 2 low-voltage work including intercom wiring, doorbells, and structured cabling. Simply replacing a failed station on existing wire is generally considered maintenance. Running new cable or adding new circuit connections requires a permit.
Intercom wiring falls under NEC Article 725 as a Class 2 circuit: maximum 30 volts, maximum 100 VA. The code specifies CL2 cable type for Class 2 wiring. CL3 cable may substitute, but the reverse is not allowed.
Class 2 wiring may not share a raceway, enclosure, or box with 120V branch-circuit conductors. That means new intercom cable cannot run through a conduit that already carries your house wiring, even if there is physical space in the conduit.
Minnesota adopted the 2026 NEC on August 17, 2026. Any permit pulled today must comply with the current code. The 2023 NEC reorganized the Class circuit articles: Class 1 circuits moved to a new Article 724, so Article 725 now covers only Class 2 and Class 3. If you are working with an electrician who references the old article numbering, that is a signal to ask whether they are current on the 2026 adoption.
For a full breakdown of what Minnesota’s permit process covers and when homeowner exemptions apply, see our post on electrical permits in Minnesota.
Battery WiFi models fall entirely outside this permit scope. They are consumer electronics. No wiring means no Class 2 circuit means no PLT work means no permit required. The tradeoff is that all intercom functionality depends on your WiFi network staying up.
How much does it cost to put an intercom system in your house?
The short answer: Cost ranges widely based on your path. A battery WiFi unit is hardware only, typically $50-$300. A retrofit using existing wiring adds labor but no rough-in cost. A full new wired installation through finished walls is the most expensive option, driven by wall construction type, number of stations, and total cable run.
The retrofit path using an IP converter over existing 2-conductor wire cuts cost significantly versus a full new rough-in. In a typical 1970s Twin Cities ranch with intact NuTone 3-wire cable, the wiring scope often reduces to termination work at each station plus the 120V outlet or connection at the master location. That is a fraction of the cost of fishing new cable through every room.
A few factors that push cost up:
- Plaster-and-lath walls (common in pre-1960 Twin Cities homes) versus drywall
- Number of substation locations
- Distance from master station to the farthest room
- Whether the 120V supply needs a new circuit or can tap an existing outlet
A few factors that bring cost down:
- Existing 3-wire or 4-wire NuTone cable in good condition
- Open wall cavities accessible from an unfinished basement or crawl space
- Choosing the IP converter path that keeps existing rough-in
For larger jobs, financing is available. Ask when you call or book.
The most reliable way to get an accurate number is to have an electrician test your existing wiring first. We can usually tell you within the first visit whether your old NuTone cable is worth reusing or whether a new run makes more sense.
Schedule your intercom installation today
If your 1980s master station finally stopped working, or you want video intercom capability without tearing out your walls, Northern Mister Sparky can help. We are locally owned and operated in the Twin Cities, and as America’s On-Time Electrician(R), we show up when we say we will.
Call 763-200-5956 or book online to schedule. We will test your existing wiring, walk you through the options that actually fit your home, and give you a straight price. No malarky.
Frequently Asked Questions
Can I reuse my existing NuTone wiring for a new modern intercom system? +
What is a PLT license and why does it matter for intercom installation in Minnesota? +
Need an electrician now?