
Outdoor Light Timer Switch Installation in Minnesota
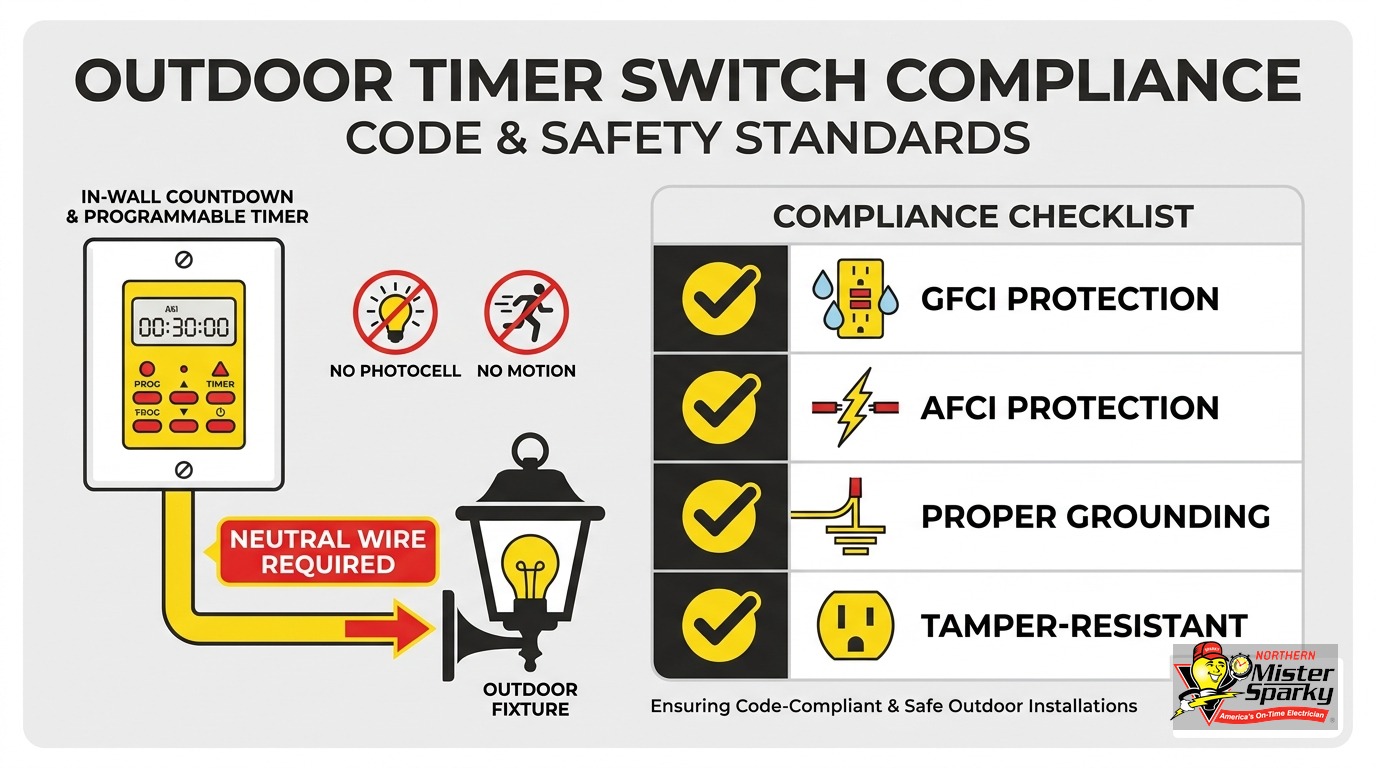
Key Takeaways
- Two types, one critical difference. Countdown timers shut lights off after a fixed interval. Programmable timers store a 7-day weekly schedule. Countdown timers usually need no neutral conductor. Programmable timers almost always do.
- Older Twin Cities homes often lack a neutral at the switch. A box wired with only a switch leg has no neutral. Under NEC 404.22, a countdown timer in no-neutral form is often the code-compliant choice for those locations.
- LED compatibility is a real issue. Pairing a no-neutral countdown timer with low-wattage LEDs can cause flickering and ghost light. Check minimum load specs and look for CL-rated timers.
- Minnesota is on the 2026 NEC as of August 17, 2026. Any permit filed after that date must comply with the current code. Many DIY guides predate this adoption.
- Permit rules depend on scope. A straight swap in the same box may not require a permit. Adding a neutral or running new wiring always does.
- Not sure what is in your box? Call us. 763-200-5956.
What Is an Outdoor Light Timer Switch?
Quick answer: An outdoor light timer switch replaces a standard wall switch. It controls your fixture on a clock-based schedule - not by daylight level or motion. You get repeatable, predictable control of any hardwired outdoor light based on time alone.
A timer switch installs in the same wall box as your existing light switch. It controls the circuit to your outdoor fixture - a porch light, soffit array, garage exterior light, or landscape floods - based on time rather than ambient light or movement.
That puts timer switches in a separate category from photocell (dusk-to-dawn) sensors, which respond to light levels, and motion sensors, which respond to occupancy. A timer follows a clock. It turns on and off at the times you set, regardless of weather, daylight, or whether someone walks past the sensor.
For a front porch light you want off by midnight, or security lighting you want running on a plausible occupied schedule, a timer is the right tool.
Countdown vs. Programmable: Which Type Do You Need?
Quick answer: Choose a countdown timer when you want lights off after a set number of minutes - the typical range is 5 to 120 minutes. Choose a programmable 7-day timer when you need a repeating weekly on/off schedule. The choice also determines your wiring requirements, specifically whether you need a neutral conductor in the switch box.
These two types get lumped together in most installation guides, but they work differently and wire differently.
Countdown timers operate on a fixed decrement. You turn the switch on and set a duration - 5, 10, 15, 30 minutes, or up to two hours. After the time expires, the switch shuts the light off and stays off until you turn it on again. Most countdown timers, such as the Leviton DT130-1LW, are designed for no-neutral operation - they power their internal electronics through a small bleed current drawn through the connected load. A typical countdown timer handles up to 600W of LED/CFL load on a 15A single-pole circuit.
Programmable (7-day) timers store ON/OFF events for each day of the week. A display and an internal clock retain the schedule continuously - even when the lights are off. Maintaining that standby state requires constant low-voltage power, which means a neutral conductor in the switch box.
When countdown makes sense: You want the backyard light to shut itself off 30 minutes after you turn it on. You open the garage at 6 a.m. and want the exterior light to time itself off so you do not leave it burning all day. Fixed-duration control.
When programmable makes sense: You want your front porch light on from 6 p.m. to 11 p.m. every night without touching the switch. You are away on a trip and want exterior lights running on a convincing schedule. Day-of-week flexibility and hands-off daily operation.
The wiring difference is what catches homeowners off guard during outdoor light timer switch installation. You may not know what is in the box until you open it.
Does Your Switch Box Have a Neutral Wire?
Quick answer: Open the box and look. A neutral is typically a white wire that connects to the switch itself - not one that simply passes through the box to the fixture. If the box holds only two conductors (a black hot and a white switched hot), that is a switch leg, and there is no neutral present. Switch legs are common in older Twin Cities homes.
The neutral wire question is the single biggest variable in outdoor light timer switch installation. It determines which types of timers you can install without pulling new wire.
NEC Section 404.2(C) requires a neutral conductor at switches controlling line-to-neutral lighting loads in bathrooms, hallways, stairways, and habitable rooms. NEC Section 404.22 extends this requirement to replacement switches: if the new switch needs a neutral to power its standby electronics, you must provide one.
There is an exception that applies directly to older Minnesota homes. If the location was wired before Section 404.2(C) was adopted, and running a neutral to the box would require removing finish materials, the installation is exempt from the neutral requirement. The exception carries limits: no more than five such switches per branch circuit, and no more than 25 per feeder.
For a pre-1980s Twin Cities home with a switch leg and no neutral, a countdown timer in no-neutral form is typically the correct, code-compliant choice. A programmable timer that needs a neutral may require pulling wire back to the panel, which changes both the scope and the cost of the job significantly.
If you are unsure what is in your switch box, our post on smart switches with no neutral wire covers the same box situation from a smart-home angle and can help you understand what you are working with before you buy anything.
Why Does My Outdoor Timer Switch Flicker with LED Bulbs?
Quick answer: No-neutral countdown timers power their internal electronics through a bleed current drawn through the bulb. If the LED fixture’s wattage falls below the timer’s minimum load spec, the bulb flickers, holds a faint glow when the switch should be off, or behaves erratically. Look for a CL-rated timer engineered for low-wattage LED loads.
This is one of the most common complaints after a DIY outdoor light timer switch installation - and most guides never explain the mechanism.
No-neutral countdown timers draw a small current through the connected load to keep their internal clock running. If the bulb’s wattage is too low to pass that current without a voltage drop appearing across the fixture, the LED flickers or holds a residual glow even when the switch says “off.”
Modern LEDs make this problem more likely, not less. A 6W LED that replaces a 60W incandescent draws a fraction of what the old bulb did. The timer’s minimum load floor - often printed on the spec sheet and not on the box - may not be met by today’s energy-efficient outdoor bulbs. This “ghost light” effect can look like a wiring fault when it is actually a load mismatch.
The solution has two parts. First, look for a timer carrying a “CL” designation. CL (Compensating LED) timers and dimmers are engineered specifically for low-wattage LED loads and suppress the bleed current problem. Second, verify the minimum load spec before you buy. If your outdoor fixture runs a single 6W bulb, confirm the timer operates reliably at that wattage.
If you cannot meet the minimum load with the current fixture, you have two practical options: swap to a higher-lumen LED that draws more watts, or switch to a neutral-required programmable timer that does not rely on a bleed current through the load at all.
What Does Minnesota’s 2026 NEC Mean for Timer Switch Installations?
Quick answer: Minnesota adopted the 2026 NEC effective August 17, 2026. Any electrical permit filed on or after that date must comply with the 2026 code, including Articles 404 and 410 governing switches and luminaires. Outdoor timer installations also require GFCI protection where the code specifies and weatherproof enclosures for all exterior-mounted equipment.
This is not a distant rule change. Minnesota’s Board of Electricity adopted the 2026 NEC with an effective date of August 17, 2026 - six weeks ago as of this writing. Licensing exams moved to 2026 NEC content on September 8, 2026. Permits filed before August 17 still comply under the 2023 NEC. Any blog post, YouTube tutorial, or forum thread written before this summer may reference outdated code.
Outdoor lighting circuits must be properly grounded and GFCI-protected where the code specifies, and timer switches must be housed in weatherproof enclosures with appropriate IP ratings. In Minnesota’s climate, that weatherproofing requirement carries real weight.
Freeze-thaw cycling cracks unsealed plastic covers over the course of a single Minnesota winter. Condensation forms inside boxes without proper seals. An IP65-rated enclosure is a reasonable minimum for any switch or box mounted on an exterior wall. Gasket-sealed in-use covers are not optional here - they are functional.
Cold temperatures affect programmable timers directly. Digital displays can dim or fail below minus 10 degrees Fahrenheit. Some programmable models use battery backup to retain schedules through power outages, and those batteries lose capacity quickly in extreme cold. A countdown timer with no display electronics is more resilient in an unheated garage or exterior location. That is one more practical reason countdown designs often win for Minnesota outdoor installs.
Do You Need a Permit to Replace a Light Switch with a Timer?
Quick answer: A like-for-like swap in the same box - same location, no new wiring - may not require a permit. If you need to pull a neutral conductor, add a new circuit, or relocate the box, a permit is required. Homeowners may perform their own electrical work on a homesteaded residence, but not in condos, apartments, or any unit rented to others.
Minnesota requires an electrical permit for most non-cosmetic electrical work. A homeowner can perform that work on property they own and occupy as their primary residence. The right does not extend to rental units, condominiums, apartments, or any portion of the home rented to tenants.
For a timer switch swap, the dividing line is new wiring. Replacing a standard single-pole switch with a countdown timer in the same box, touching no new conductors, is often treated as a like-for-like replacement. Pulling a neutral to the box - or running a new circuit - crosses into new work and requires a permit.
When you are unsure, call the Minnesota Department of Labor and Industry at 651-284-5026 before you start. Minneapolis homeowners apply for permits through the city separately. Online applications are available through the DLI portal.
The cost of filing the wrong assumption is an open permit that appears on a home inspection report at sale time. Getting clarity upfront takes one phone call.
Choosing the Right Timer for Twin Cities Winters
Minnesota winters put outdoor electrical gear under sustained stress. December sunrise falls around 7:45 a.m. Sunset arrives around 4:30 p.m. - roughly nine hours of darkness at the solstice. Your outdoor lighting schedule needs to shift by 20 to 30 minutes every few weeks through fall and spring to stay useful.
A programmable 7-day timer handles seasonal drift well when you update the schedule manually each fall and spring. Some programmable models include an astronomical clock feature that adjusts ON/OFF times automatically based on your latitude and the current date. That feature earns its keep during a Minnesota winter without requiring you to reprogram every few weeks.
Photocells are an alternative for dusk-to-dawn control, but they have a documented liability in heavy snow. Snow-reflected light can trick a photocell sensor into keeping lights off during a storm. Ice accumulation over the lens delays dawn triggering. A timer’s clock-based control operates independently of weather conditions and ambient light levels - a meaningful advantage in the months when both factors are unreliable.
For any outdoor installation, use a weatherproof in-use cover rated for wet or damp locations. Seal conduit entries with appropriate fittings. Verify the IP rating on the device itself, not just the enclosure. Our outdoor lighting installation guide covers weatherproof box selection, conduit sealing, and placement considerations for exterior Minnesota installations.
How to Install an Outdoor Light Timer Switch: Step by Step
This walkthrough covers a standard single-pole swap. Stop and call a licensed electrician if you open the box and find aluminum wiring, no ground, burned or melted insulation, or any conductors you cannot identify with certainty.
What you need:
- Non-contact voltage tester
- Flathead and Phillips screwdrivers
- Wire strippers
- Needle-nose pliers
- The timer switch and manufacturer-included wire nuts
- Weatherproof in-use cover if the box is exterior-mounted
Steps:
-
Turn off the breaker. Locate the breaker for the outdoor lighting circuit. Turn it off. Tape the breaker and post a note so no one flips it back on while you work.
-
Confirm power is off. Use a non-contact voltage tester on the existing switch terminals before touching any wire. This step is not optional.
-
Remove the existing switch. Unscrew the cover plate, then the mounting screws. Pull the switch out of the box carefully. Photograph the wiring before disconnecting anything.
-
Identify your conductors. A switch leg has a black (hot) and a white conductor used as a switched hot, often marked with black tape at the ends. A fully wired box also includes a bare or green equipment ground and a separate white neutral.
-
Check for neutral. If your timer requires a neutral and the box has none, stop here. Connecting a neutral-required timer to a switch leg damages the device and creates a code violation. This is the point where the job calls for a professional electrician.
-
Connect the new timer. Follow the manufacturer’s wiring diagram precisely. Countdown timers typically have two conductors: line and load. Programmable timers with neutral requirements add a third terminal. Use the included wire nuts. Fold conductors neatly into the box so they do not pinch under the mounting screws.
-
Secure and test. Seat the timer in the box, tighten the mounting screws, and install the cover plate. Restore power at the breaker. Set the timer to a test cycle and confirm the fixture responds at the scheduled time.
If the job expands beyond a straight swap - neutral needed, unknown wiring, or a circuit with no GFCI protection you want corrected at the same time - call us before continuing.
When to Call a Licensed Electrician
Some outdoor timer switch swaps are genuinely simple. Others are not. Call Northern Mister Sparky when:
- The box has no neutral and your chosen timer requires one
- The wiring is aluminum, burned, brittle, or unidentifiable
- The outdoor circuit has no GFCI protection and you want that corrected at the same time
- You want a new circuit run from the panel to a location with no existing fixture
- You are unsure whether your project scope requires a permit
We are locally owned and operated in the Twin Cities, backed by the “America’s On-Time Electrician(R)” standard and the UWIN(R) 100% satisfaction guarantee. No malarky, no surprise fees - just a licensed electrician who shows up on time and does the work right the first time.
Call 763-200-5956 or schedule your outdoor lighting installation online.
Frequently Asked Questions
Does replacing a light switch with a timer require an electrical permit in Minnesota? +
Why is my outdoor timer switch flickering with LED bulbs? +
What is the difference between a countdown timer and a programmable timer switch? +
Need an electrician now?