
Attic Ventilation Fan Electrical Wiring: Twin Cities Guide
Key Takeaways
- Minnesota requires a DLI permit for any new attic fan circuit. The homeowner permit carries a fee. You must occupy the home as your primary residence.
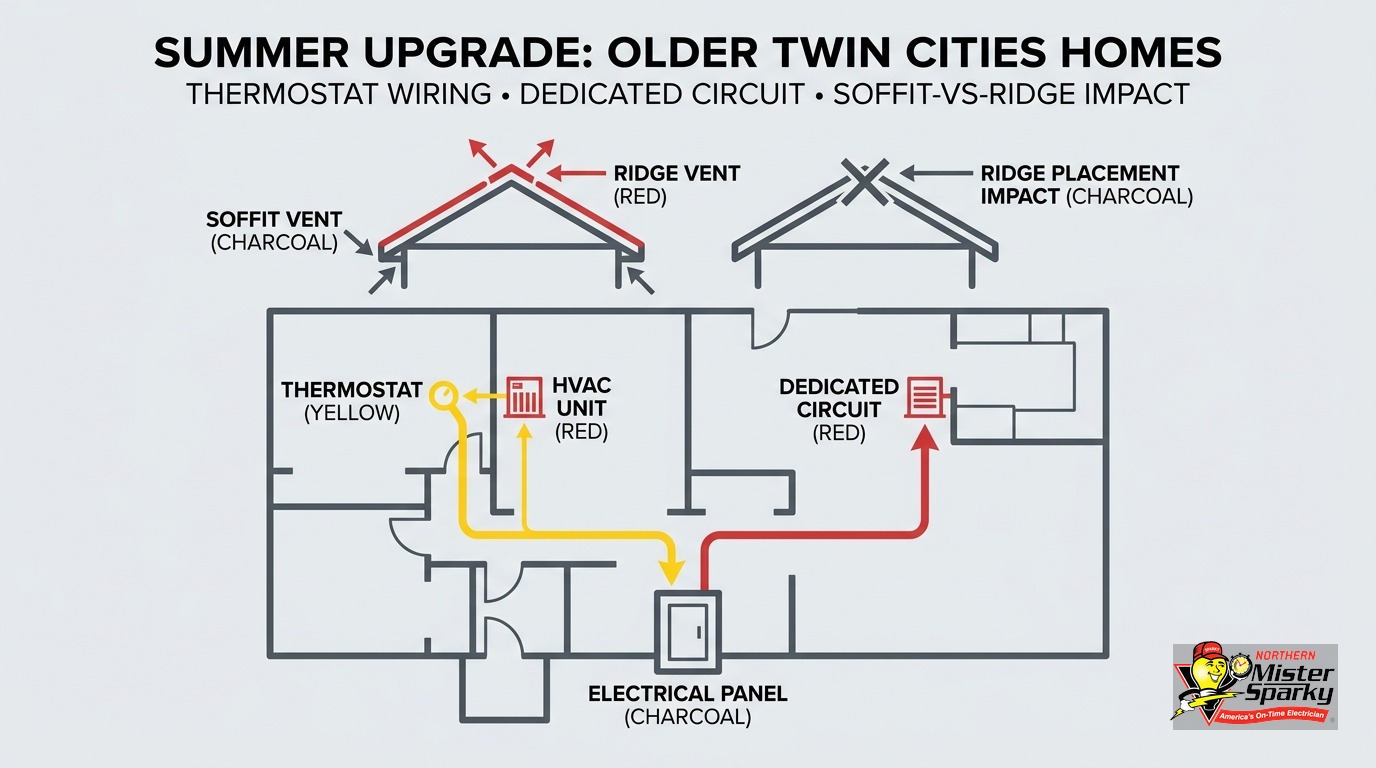
- Ridge vents and powered fans conflict. If your home already has a ridge vent, adding a powered fan often makes attic ventilation worse, not better.
- A dedicated circuit is not legally required for most fans under 1 HP, but the shared circuit must have enough capacity for a continuous load.
- The humidistat matters more in Minnesota than the thermostat. Wire it in parallel for year-round moisture control and ice dam prevention.
- NEC 210.63 requires a GFCI-protected service receptacle within 25 feet of the fan. This applies even if a nearby circuit already exists.
- AFCI protection depends on where the control switch sits. If the switch is inside your living space, the entire circuit needs AFCI.
Before You Wire Anything: Two Questions That Change the Project
Most online guides skip straight to the wire connections. That is a mistake.
Two structural questions about your home determine whether a powered attic ventilator will help at all. Answer them before you buy a fan, let alone wire one.
Question one: Do you already have a ridge vent?
Question two: Do your soffits provide adequate intake ventilation?
The answers change the entire project scope. A powered fan paired with an existing ridge vent can short-circuit your ventilation system and leave the lower attic stagnant. Undersized soffits give the fan no replacement air to draw in, and it works against itself.
The soffit question is trickier than it sounds. Adequate intake means at least 1 square foot of net free area for every 150 square feet of attic floor space, or 1 per 300 square feet if a vapor barrier is present. Soffits that are painted over, blocked by insulation, or too shallow to allow real airflow are common in 1950s and 1960s construction. Check before you buy.
Does Your Home Already Have a Ridge Vent?
Look at the peak of your roof from outside. A ridge vent is a long, low cap running the length of the ridgeline. It is usually shingle-over style and blends into the roofline. Homes reroofed after roughly 1990 in the Twin Cities commonly have them. If you see one, stop before buying a fan and read the next section.
If you have a ridge vent and add a powered fan near the peak, the fan pulls air backward down through the ridge opening instead of upward from soffit vents. The lower attic pocket stays poorly ventilated. You have spent money making the problem worse.
Small solar fans rated under 500 CFM are less likely to cause this problem. Their draw is too weak to overcome the stack effect at the ridge. A standard electric PAV rated at 1,000 CFM or more will short-circuit a ridge vent system reliably.
The scenario where a PAV works best is common in older Minneapolis and St. Paul neighborhoods: plenty of soffit intake area, no ridge vent, and a sealed-feeling attic that bakes in summer. Homes in Nokomis, Como, St. Anthony Park, South Minneapolis, and similar 1950s-era neighborhoods often fit this profile exactly.
If you do have a ridge vent and still want lower attic temperatures, the more effective path is sealing attic bypasses, adding soffit intake area, and improving attic floor insulation. The DOE recommends R-49 to R-60 for Minnesota attics. Addressing insulation first often delivers better results than any fan at a lower total cost.
What Does Minnesota Law Require for Attic Ventilation Fan Electrical Wiring?
Minnesota requires a DLI electrical permit before any new attic fan circuit goes in. The homeowner permit carries a fee. You must occupy the home as your primary residence to pull your own permit. The circuit must pass inspection before it goes into service.
This is the point every generic DIY guide skips entirely. In Minnesota, adding a new circuit is not a permit-optional project. The Department of Labor and Industry requires a permit and inspection regardless of who does the work. If you hire an electrician, they pull the permit. If you do it yourself, you pull the homeowner permit.
You can reach the DLI electrical division at (651) 284-5026 or dli.electricity@state.mn.us.
A note on code timing: Minnesota currently follows the 2023 NEC. The 2026 NEC takes effect August 17, 2026. Permits filed before that date will be inspected under 2023 code. Permits filed after will follow the 2026 NEC. If your project straddles that date, confirm with DLI which version your inspector will apply.
For a full overview of what Minnesota electrical permits cover and how the application process works, see our guide to Minnesota electrical permit requirements.
Does an Attic Ventilation Fan Need a Dedicated Circuit?
No, not legally, for most fans under 1 HP. The NEC does not mandate a dedicated circuit for small motors. But the fan’s continuous load cannot exceed 50% of the shared circuit’s capacity, and conductors must be rated at 125% of the motor’s full-load current under NEC 430.22A.
That said, a dedicated circuit is often the right call in practice.
Here is the load math. A standard 15A circuit can safely carry 12A continuously (80% of rated capacity). A typical 1,000 CFM attic fan motor draws 5-7 amps. If that circuit also powers a bathroom fan, hallway lights, and a ceiling fan, you may already be at 80% load during peak use. Tapping a circuit without running the numbers is exactly what a DLI inspection will catch.
Attic fans also run for long stretches on hot summer days. A continuous load on a heavily shared circuit increases nuisance tripping risk. A dedicated circuit simplifies the wiring: one breaker, one cable run, one set of controls. No hunting for a shared circuit with enough headroom.
The other practical issue for many Twin Cities homes is panel capacity. A 100-amp service panel installed in a 1950s Minneapolis home may already be nearly full. Adding a circuit without checking available slots can mean discovering the panel is maxed out mid-project. Our post on dedicated circuits for appliances walks through how to evaluate your panel’s remaining capacity before running new wiring.
What Does NEC 210.63 Require Near the Attic Fan?
NEC 210.63 requires a 125V, 15- or 20A receptacle within 25 feet of HVAC-type equipment located in the attic. Under the NEC that Minnesota follows, that receptacle must be GFCI-protected. If your attic does not already have one, the installation must include it.
The reason is practical. A technician servicing or replacing the fan needs a nearby power source. Running an extension cord from the living space below is not a safe or practical alternative in a working attic. The GFCI requirement is there because attics experience meaningful humidity swings, especially in Minnesota winters when frost and condensation are common near the roof deck.
If you are running a new circuit to the attic anyway, adding the GFCI service receptacle to that same circuit is straightforward. Factor it into your materials list and your permit application from the start.
Does Your Attic Fan Circuit Require AFCI Protection?
It depends on where the control switch is located. NEC 210.12 requires AFCI protection in bedrooms and most living spaces. If the thermostat or wall switch for your attic fan is installed inside the home’s conditioned living area, the entire fan circuit requires AFCI protection from the breaker panel forward.
If the controls are mounted entirely in the unconditioned attic space, AFCI may not be required under NEC 210.12. But your DLI inspector has final say on how the code applies to your specific installation.
When in doubt, install an AFCI breaker. It adds $20 to $30 to the project and protects against arc faults anywhere along the circuit, including wiring that runs through wall cavities and ceiling assemblies. For a full breakdown of where AFCI protection is required throughout a Minnesota home, see our post on AFCI breaker requirements.
How Should You Wire the Thermostat and Humidistat?
The thermostat wires in series on the hot (black) wire. One terminal receives hot-in from the circuit; the other sends hot-out to the fan. The humidistat wires in parallel with the thermostat so either control can independently trigger the fan. Neutral wires splice together and run directly to the fan without connecting to either control. Standard conductor is NM cable.
Here is how the connections break down in practice.
Thermostat wiring (series on the hot wire):
- Bring the hot (black) wire from the circuit into the thermostat’s line terminal.
- Run a new hot wire from the thermostat’s load terminal to the fan’s black lead.
- Splice the neutral (white) wires together. They pass through the box without connecting to the thermostat.
- Connect the ground throughout all boxes and to the fan’s ground lead.
Set the thermostat to a moderate heat threshold with a small differential. The fan turns off at 90-95 degrees. This prevents short-cycling and keeps the fan from running during the coolest part of the day.
Humidistat wiring (parallel with the thermostat):
Adding the humidistat in parallel means either control can trigger the fan independently. That is the configuration you want for Minnesota year-round use.
- Connect one humidistat terminal to the same hot-in connection the thermostat uses.
- Connect the other humidistat terminal to the hot wire running to the fan, at the same junction as the thermostat’s load output.
- Neutral and ground connect the same way as the thermostat side.
Set the humidistat to 60-70% relative humidity. When winter moisture in the attic crosses that threshold, the fan runs to exhaust damp air. This is the primary tool against ice dam formation and attic mold during Minnesota winters.
In summer, the thermostat triggers the fan on heat. In winter, the humidistat takes over on moisture. The two controls together give you full-season attic management from a single fan.
Is a Powered Attic Ventilator Actually Worth It?
Probably, in the right home. Building science research shows powered attic ventilators can meaningfully reduce attic temperatures but often cut air conditioning bills by only a small margin. In leaky homes, a PAV can pull conditioned air upward and actually increase cooling costs. Seal and insulate the attic floor before adding a fan.
Here is the full picture before you commit to the project.
A study cited by the Florida Solar Energy Center found that a PAV reduced attic temperature by 22 degrees Fahrenheit but cut air conditioning energy use by only 6%. The fan’s own electricity consumption ate substantially into those savings.
Energy Vanguard explains why: for a PAV to reduce cooling loads, makeup air must come from outside, not from the conditioned living space below. In most older Twin Cities homes, the attic floor is leaky. Gaps exist around recessed lights, plumbing penetrations, top plates, attic hatches, and pull-down stair frames. A powered fan depressurizes the attic and draws air upward through every one of those gaps. Your air conditioner works harder to replace the conditioned air that was lost.
There is one additional concern in homes with atmospherically vented gas appliances. A powerful fan can backdraft a water heater or furnace, pulling combustion gases back into the living space. If your home has a gas water heater, furnace, or boiler with natural-draft venting, have a professional assess this interaction before you install a PAV.
No malarky: fixing the attic floor insulation and sealing bypasses often delivers better results at a lower total cost than adding a fan.
When a powered attic ventilator makes sense:
- Your home has good soffit intake ventilation and no ridge vent.
- The attic floor is well-sealed and insulated to at least R-49.
- You are adding the humidistat specifically for winter moisture control, which has clearer documented benefits in Minnesota.
- You do not have gas appliances with natural-draft venting near the attic space.
When to reconsider:
- A ridge vent is already installed on the roof.
- Attic insulation is below R-49.
- You have a gas appliance with atmospheric venting.
One practical note on rebates: Xcel Energy does not currently offer a standalone rebate for powered attic ventilators. Their residential programs cover insulation upgrades (up to $800), HRV/ERV equipment, and HVAC systems. Do not budget around a PAV rebate that does not exist.
Attic Ventilation Fan Electrical Wiring: A Step-by-Step Overview
This is a high-level walkthrough, not a replacement for a licensed electrician or a DLI inspection. Minnesota permit law requires that new circuits be inspected before they go into regular use.
Step 1: Pull the permit before any work starts.
Apply through DLI or contact the electrical division at (651) 284-5026. The homeowner fee is $25 plus a $1 surcharge. This step is not optional under Minnesota law.
Step 2: Plan the circuit.
Decide whether to tap an existing branch circuit with enough headroom or run a new dedicated 15A or 20A circuit from the panel. Check your panel for open breaker slots and available capacity. If the panel is full or undersized, a panel upgrade may need to come first. We offer financing on panel work.
Step 3: Mount the fan.
Follow manufacturer placement specs. Avoid locating the fan directly at or adjacent to a ridge vent. Center the fan in the attic space where possible for balanced airflow coverage.
Step 4: Install the GFCI service receptacle.
Mount it within 25 feet of the fan using a weatherproof box rated for attic conditions. Wire it to the circuit ahead of the fan controls.
Step 5: Wire the thermostat and humidistat.
Series wiring for the thermostat on the hot wire. Parallel wiring for the humidistat. Splice the neutrals together. Connect the ground throughout. Use 12/2 NM cable as the standard conductor.
Step 6: Connect the fan.
Black (hot) lead to the output from the controls. White (neutral) lead to the neutral splice. Bare copper or green ground lead to the grounding run. Secure all connections in weatherproof boxes.
Step 7: Schedule the DLI inspection.
Do not energize the circuit until it passes inspection. Contact DLI to schedule. Most inspections can be set within a few days of permit issuance.
Step 8: Set the controls and test.
Thermostat: 100-105 degrees Fahrenheit. Humidistat: 60-70% relative humidity. Test both triggers before closing up attic access.
When to Call a Licensed Twin Cities Electrician
Some attic fan projects are genuinely manageable for an experienced homeowner who pulls the proper permit. Others are not. Call our team if any of the following apply.
- Your panel is a known problem brand such as Zinsco or Federal Pacific. These require professional evaluation before any new circuit is added.
- Your attic has knob-and-tube or aluminum wiring. The connection point for the new circuit needs professional assessment before any work proceeds.
- You have a gas appliance with natural-draft venting in or near the attic space.
- Your panel is already full or close to capacity.
- You are not comfortable working in a 130-degree attic space while managing live electrical connections.
That last point is practical, not just cautionary. Attic electrical work in a Twin Cities July is physically demanding. Heat exhaustion in a confined space near live wiring is a genuine hazard. Most professional electricians schedule attic work for early morning. We do the same.
Northern Mister Sparky is locally owned and operated in the Twin Cities. We handle attic fan wiring, circuit sizing, GFCI and AFCI upgrades, permit coordination, and panel work. As America’s On-Time Electrician(R), we show up when we say we will. The UWIN(R) guarantee backs every job we do.
Call us at 763-200-5956 or book your appointment online. If your project involves a panel upgrade, ask about financing options when you call.
Frequently Asked Questions
Do I need a permit to wire an attic fan in Minnesota? +
Does an attic ventilation fan need a dedicated circuit? +
Can I add a powered attic fan if my home already has a ridge vent? +
Need an electrician now?