
Add Ceiling Fan Where No Wiring Exists: Costs and Permits
Key Takeaways
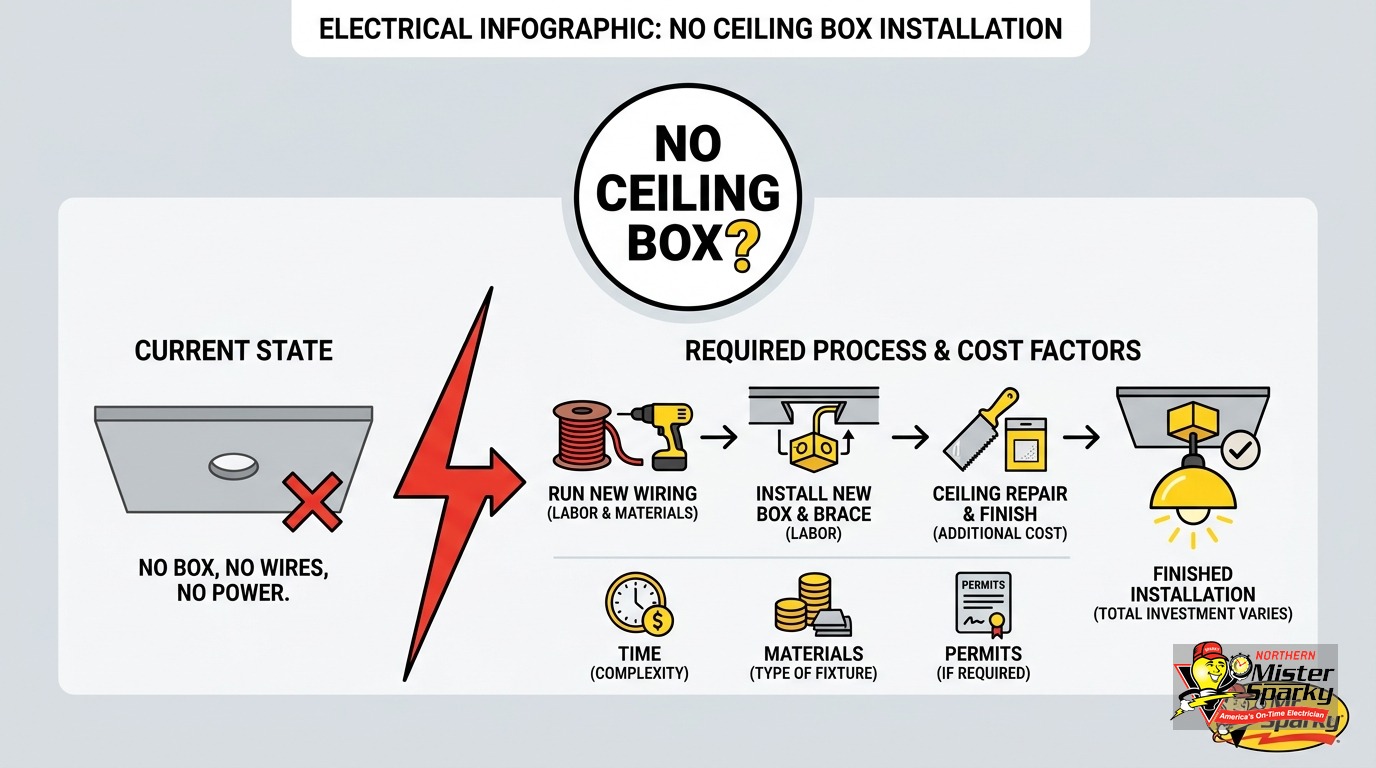
- The biggest cost variable is not the fan itself. It is whether your ceiling has open attic space above it. Open attic means a clean wire run. Finished ceiling with no attic access means cutting drywall, fishing cable, and patching every hole.
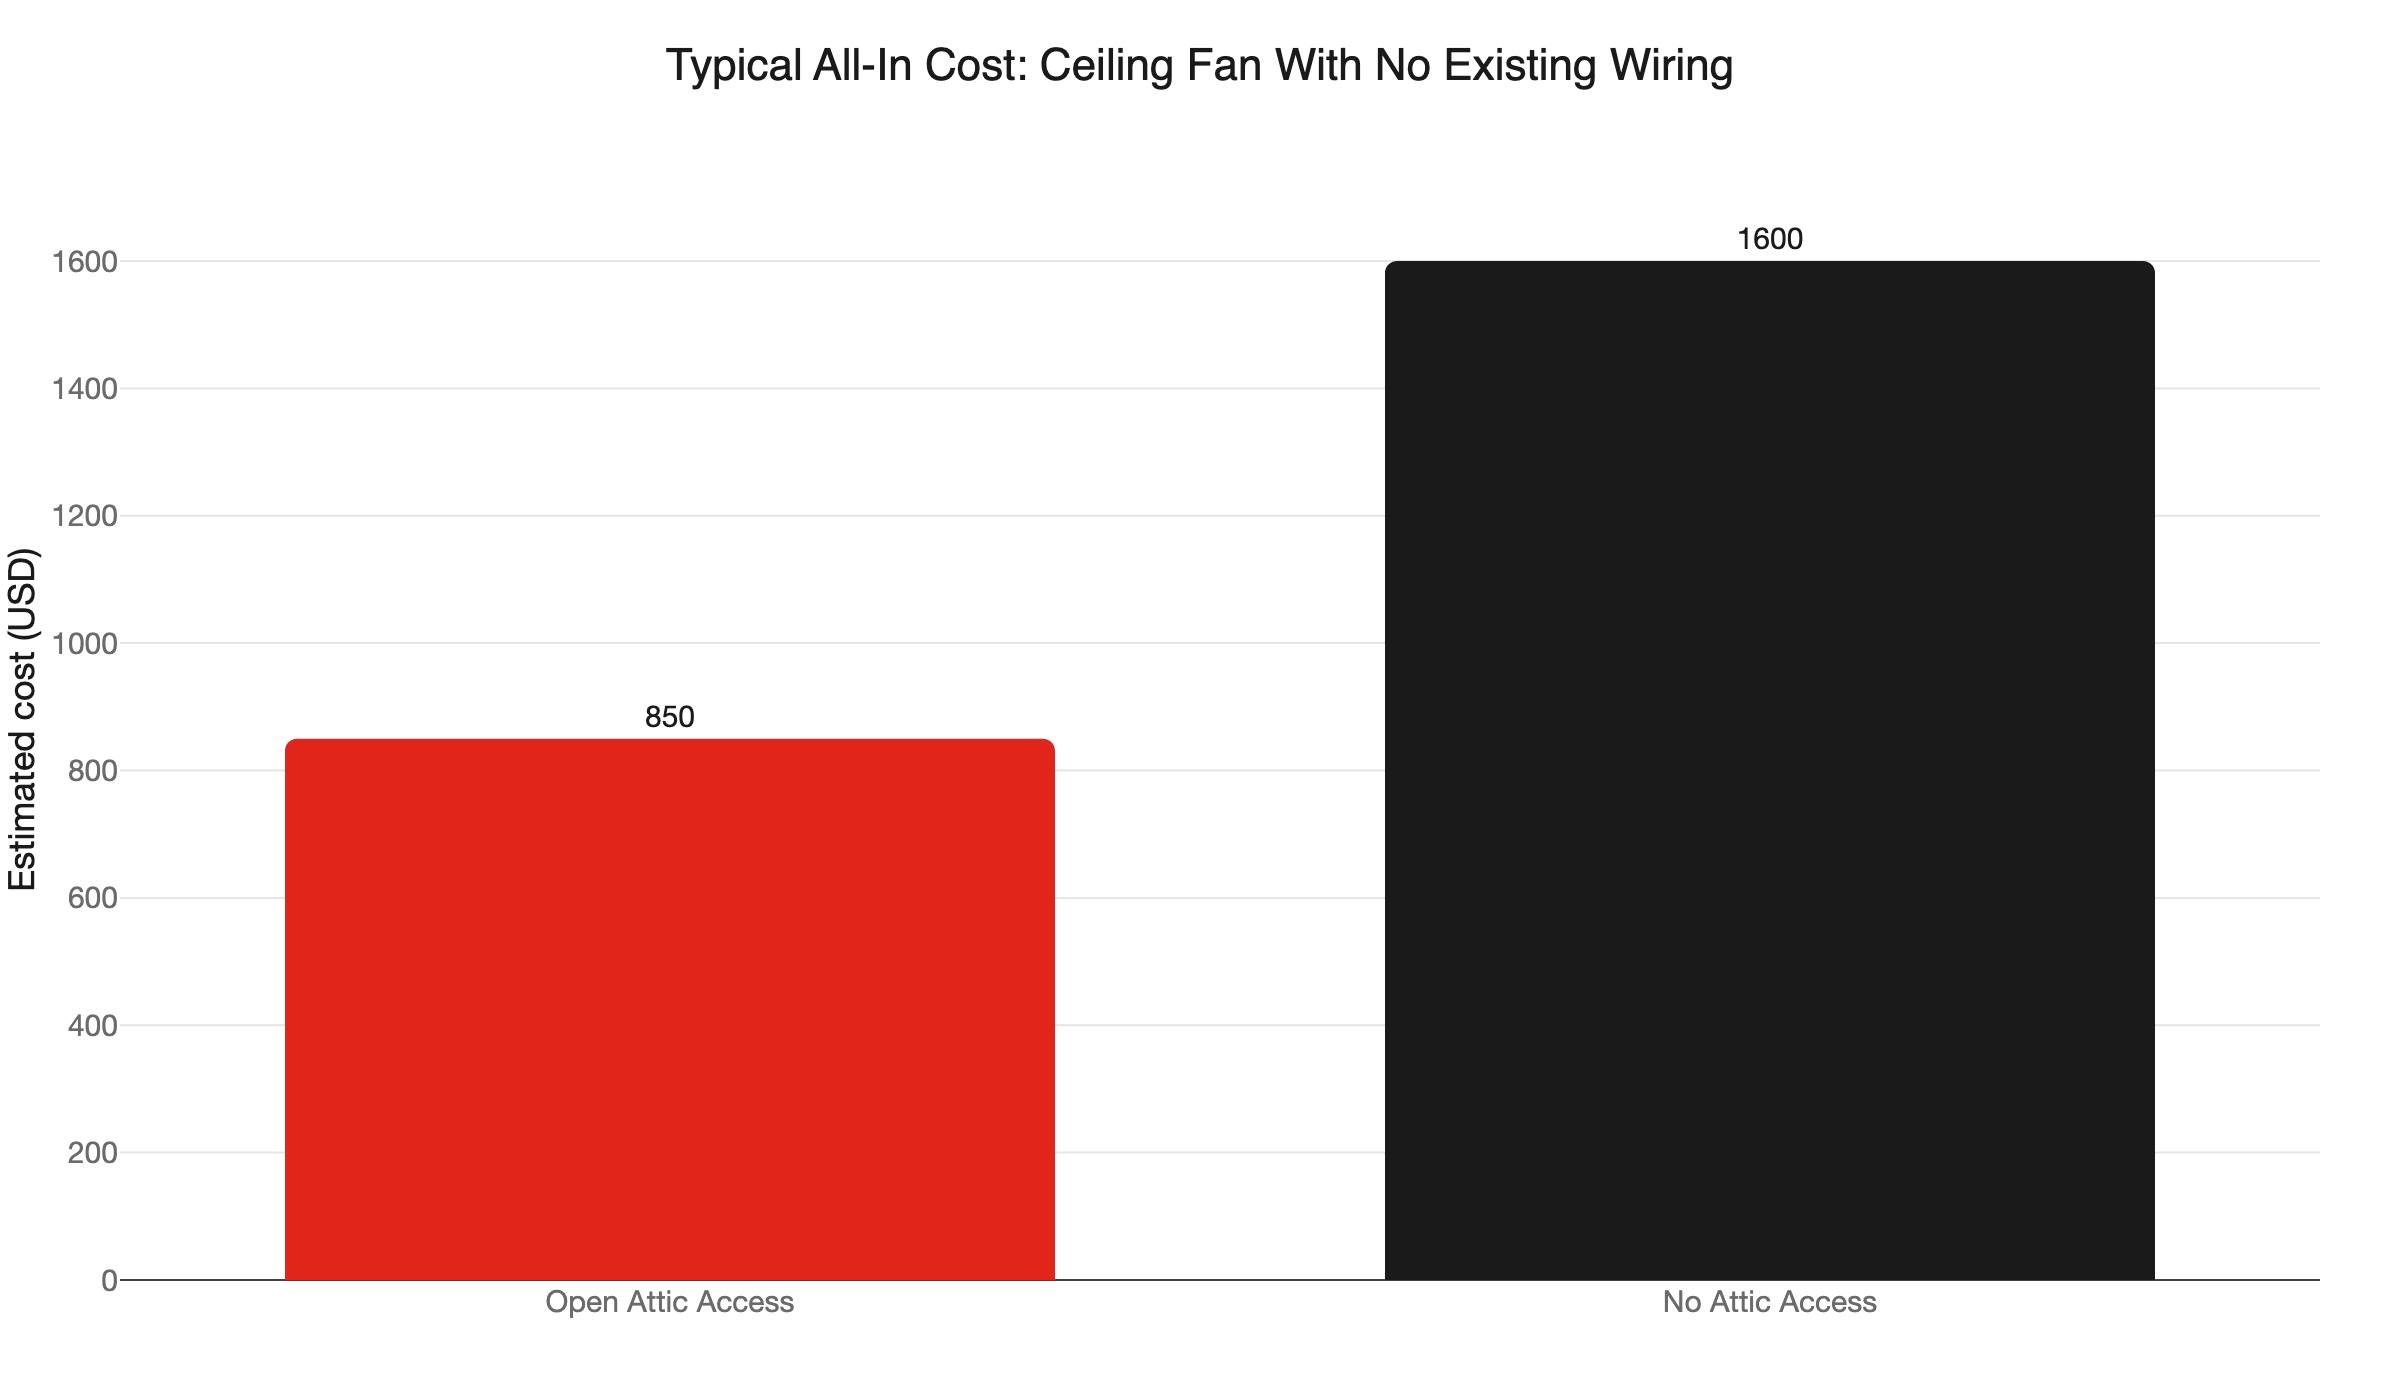
- Typical all-in cost: $700-$1,000 for accessible ceilings. Finished ceilings with no attic access typically run $1,200-$2,000 once drywall repair is included.
- Running new wiring always requires a permit in Minnesota. Two inspection checkpoints apply: rough-in before drywall closes, and final after devices are installed.
- Pre-1980s Twin Cities homes often have switch loops at the wall switch, meaning no neutral wire. Smart fans and dual-switch setups need a workaround.
- A fan-rated electrical box is required by code. Standard outlet boxes cannot legally support a ceiling fan.
- Minnesota homeowners can pull their own electrical permit online for owner-occupied, single-family homes.
What Is the Single Biggest Cost Variable When You Add a Ceiling Fan Where No Wiring Exists?
Short answer: Ceiling accessibility. Open attic above the fan location means a fast, clean wire run. Finished ceiling with no attic access means drywall cutting, cable fishing through framing bays, and patch work at every access hole. That single difference can add $600-$1,000 or more to the total.
Almost every guide on ceiling fan installation focuses on labor rates and fan price. Almost none explain why estimates range from $300 to $2,000. That range is not random. It reflects two fundamentally different jobs hiding under the same project name.
Scenario A: Open Attic Access
When an electrician can get into the attic directly above the fan location, the job follows a clean path. Cable runs from the nearest circuit or the panel, across the attic floor, and down through the ceiling framing to the fan box. No drywall cutting required above the fan. The only opening in the finished ceiling is the fan hole itself, and the fan canopy covers it when the job is done.
This is the faster, less expensive scenario. Most jobs in this category run $700-$1,000 all-in.
Minnesota’s deep insulation standard - code now targets R-49 to R-60 in attics - means that in homes where the attic is accessible, cable routing is typically straightforward. The insulation is already there and the cable runs on top of it or through the framing above, away from the insulation batts.
Scenario B: Finished Ceiling, No Attic Access
This scenario is common across the Twin Cities. Ranch-style homes built before 1980 with no attic hatch from the living area. Split-levels with finished upper floors. 1.5-story bungalows where the knee wall space is sealed off. In these homes, getting wire from the panel or nearest circuit to the fan location requires opening the ceiling and wall.
Every opening made to expose framing for cable routing is an opening that must be patched, textured to match the existing surface, and painted afterward. On a longer run, that can mean four, five, or more access cuts across the ceiling and wall.
Drywall repair is not a footnote on these jobs. It is a separate cost line that can match the electrical labor on complex runs. That is what pushes the total from $700 into the $1,500-$2,000 range. A homeowner who gets an electrical quote without a drywall quote is not seeing the full cost of the project.
What Does It Cost to Add a Ceiling Fan Where No Wiring Exists?
Short answer: Most accessible-ceiling jobs in the Twin Cities run $700-$1,000 all-in. Finished ceilings with no attic access typically run $1,200-$2,000 once electrical labor and drywall repair are both included. The wide range in national cost guides reflects exactly those two scenarios.
Here is what makes up the total:
Electrical labor This is the base cost to run cable, install the fan-rated box, wire the fan, and connect it to a switch. Labor accounts for the largest share of the total and varies with run length, ceiling type, and how many obstacles are in the path.
Fan-rated electrical box The code-required box runs $10-$25. With attic access, an expandable brace bar mounts between joists from the attic side, no ceiling cutting needed above the fan hole. Without attic access, the electrician either accesses a joist directly or inserts an adjustable brace bar through the ceiling hole and expands it to bear against the joists.
The wall switch Adding a switch where none exists adds $50-$200. The range depends on whether new cable must run to the switch box and how much wall is between the fan location and the switch.
Dedicated circuit from the panel If the nearest existing circuit is already near capacity, your electrician may recommend running a dedicated circuit from the panel. That typically adds $150-$300 to the total.
Drywall repair Every access cut needs to be closed, textured to match, and painted. This is the line item generic cost guides skip. Get a drywall quote at the same time you get the electrical quote. Do not let this be a discovery after the electrician leaves.
Permit fees A permit is required any time new wiring is run. Fees vary by municipality. The City of Rosemount’s minimum electrical permit fee for an existing single-family dwelling runs approximately $73 - a $50 inspection fee, $10 administration fee, $1 state surcharge, and a $12 circuit fee. If a re-inspection is needed, that adds another $50. Your municipality will have its own schedule.
For a full breakdown of what drives ceiling fan installation costs up or down, see our ceiling fan installation cost guide.
Do You Need a Permit to Add a Ceiling Fan Where No Wiring Exists in Minnesota?
Short answer: Yes, any time new wiring is run. Running new cable or adding a new circuit requires a permit. Simply swapping an existing fan for a new one in an approved, fan-rated box typically does not.
Minnesota adopted the 2023 National Electrical Code effective July 1, 2023. All permitted electrical work filed after that date must comply with it.
Who inspects your work?
Not everyone in the Twin Cities uses the same inspection program. The AHJ - Authority Having Jurisdiction - is the body that issues permits and approves the work. Some Twin Cities municipalities use the state’s Department of Labor and Industry (DLI) inspectors. Others run their own local programs. Confirm which program covers your address before you file. Getting this wrong means filing with the wrong office.
Can a homeowner pull the permit?
Yes. Minnesota homeowners can pull their own electrical permit online at ims.dli.mn.gov for work on an owner-occupied, single-family home. Rental properties and non-owner-occupied dwellings require a licensed electrical contractor.
One detail most homeowners miss: Minnesota’s DIY electrical permit process requires a rough-in inspection before any wiring is covered. If drywall goes back up before the inspector has seen the cable run and the box, the homeowner bears the full cost of cutting it open again. That is not a hypothetical. It happens on DIY jobs where the homeowner patches the holes right away, not realizing the inspection comes first.
Two inspection checkpoints:
- Rough-in inspection. The inspector sees the cable, the box, and the connection points before anything is covered by drywall or insulation.
- Final inspection. After the fan is installed and all devices are in place.
Schedule the rough-in before touching any drywall. This single step is what the generic how-to articles do not mention, and skipping it is what costs homeowners hundreds of dollars in re-opening fees.
What About the Wall Switch? Older Twin Cities Homes Have a Common Complication
Short answer: Pre-1980 homes often have a switch loop at the wall switch, meaning only a hot and a switched-hot wire, with no neutral. Smart fan controllers and standard dual-switch setups require a neutral wire or a hardware workaround.
Many Twin Cities homes built before roughly 1985 were wired with a method called a switch loop. Instead of running wire from the panel to the switch and then up to the fixture, the electrician ran wire down from the ceiling to the switch location. The result: only two conductors at the switch box, a hot and a switched-hot. No neutral wire.
That matters here because modern smart fan controllers typically need a neutral wire to operate. So does a standard dual-switch setup where one switch controls the fan speed and a separate switch controls the light kit independently. Without a neutral at the switch, you have three options:
- Run new cable to the switch location. This adds labor and potentially more drywall cuts along the switch wall. It gives you full flexibility, including any smart control you want.
- Use a no-neutral-compatible controller. Some smart switches work without a neutral. Compatibility varies by fan model and by the specific controller. Confirm before buying.
- Use a wireless canopy receiver. A small receiver ($15-$30) mounts inside the fan’s canopy and pairs with a handheld remote or a wireless wall button. This sidesteps the switch wiring issue entirely.
Our post on ceiling fan remote vs. wall switch wiring covers the trade-offs in more detail. The key point: if you want a smart setup or a clean dual-switch arrangement, tell your electrician before the job starts. Addressing the switch loop is straightforward at the start. It is much more disruptive to discover after the ceiling is closed.
Does Your Ceiling Need a Special Box to Support a Fan?
Short answer: Yes, always. A fan-rated electrical box is required by the National Electrical Code and by most local programs. The City of Rosemount’s electrical code specifically states that “special approved fan boxes should be used for support of ceiling fans.” A standard outlet box is not a legal installation.
Here is why. A ceiling fan weighs more than a light fixture and oscillates continuously when running. That dynamic load - constant vibration and the wobbling motion of the spinning blades - creates stress that a standard outlet box is not designed to handle. A fan mounted on an inadequate box can work loose over time and fall. The fan-rated box is not optional.
Fan-rated boxes carry a label reading “For Fan Support” and run $10-$25. Installation depends on your ceiling:
- Attic access available. An expandable brace bar mounts between joists from the attic side. The only work at the ceiling is the fan hole itself.
- No attic access. The electrician either cuts to directly access a joist for mounting or inserts an adjustable brace bar through the fan hole and expands it to bear against the joists from below.
One common discovery on older homes: the existing light fixture at the intended fan location is sitting in a standard outlet box. That box needs to be replaced with a fan-rated box before the fan goes up. This adds a small amount to the job. It is worth knowing up front so the quote reflects reality.
Can You Do This Work Yourself?
Short answer: Legally, yes, for owner-occupants of single-family homes in Minnesota. Practically, a no-attic-access wire run through a finished ceiling is not a beginner project, and the code and inspection requirements are identical to what a licensed contractor must follow.
Minnesota allows homeowners to do their own electrical work and pull their own permits. The 2023 NEC applies. The inspections are the same. If work fails the rough-in inspection, the re-inspection fee is real money out of pocket on top of the original permit cost.
The fan itself is the easy part. The wire run through a finished ceiling is where the complexity lives. Fishing cable through framing bays requires the right tools - fish tape, a stud finder, a flexible drill bit, and often a glow rod - and a feel for how older homes are framed. Getting the path wrong means more access cuts. Getting the box wrong means the fan comes down.
The switch loop issue is the other common surprise for first-timers. Open the switch box before you start the job. If you see two wires and no neutral, you know what you are dealing with before you have committed to a plan.
For most homeowners, the wiring is the part worth hiring out. Some electricians will leave a pigtailed wire at the ceiling location and let the homeowner mount the fan. Ask about that split arrangement when you get your quote.
What If the Fan Location Has a Vaulted or Cathedral Ceiling?
Short answer: Sloped ceilings require fan mounting hardware rated for the pitch angle, and attic access is often absent by definition. Budget more time and more labor than a flat-ceiling job.
Vaulted and cathedral ceilings change the job in a few concrete ways. The framing runs at an angle, which affects how brace bars seat and how cable routes through the structure. Attic access is often absent entirely, which means the no-attic scenario above applies by default. The fan must also mount with a sloped ceiling adapter or a downrod sized to the pitch angle so the blades hang level.
Our post on ceiling fan installation for vaulted and cathedral ceilings covers those specifics in detail. If your ceiling slopes, start there before estimating costs or ordering a fan.
What to Expect When You Call Northern Mister Sparky
When you call us at 763-200-5956 or schedule ceiling fan installation online, the first thing we do is ask the right questions.
Attic access or finished ceiling? Pre-1980 home? What is currently at the switch? Vaulted ceiling? We know the questions that determine the scope of the job before anyone drives out to the house. You do not have to guess at the answers.
On-site, we look at the actual ceiling, confirm attic access or the lack of it, check the switch box, and give you a quote that includes electrical labor, the fan-rated box, and any drywall work the cable run requires. No line items that appear after the work starts.
We handle the permit filing and schedule both the rough-in and final inspections. You do not have to navigate the DLI, your local AHJ, or the ims.dli.mn.gov portal on your own.
Locally owned and operated in the Twin Cities, and as America’s On-Time Electrician(R), we show up when we say we will. If the work does not meet your expectations, the UWIN(R) 100% satisfaction guarantee covers it. If the project involves a new panel circuit, a panel upgrade, or other larger work alongside the fan installation, financing is available - ask when you call.
Frequently Asked Questions
Do I need a permit to add a ceiling fan where no wiring exists in Minnesota? +
How much does it cost to add a ceiling fan with no existing wiring? +
What is a fan-rated electrical box and why do I need one? +
Need an electrician now?