
How to Find Electrical Wire Behind Wall Before You Drill
Key Takeaways
- Turn the circuit ON before scanning for wires. Turn it OFF before drilling. This is the single most important step in this guide.
- Stud finders with AC wire detection only detect energized (live) conductors. A dead circuit is invisible to the sensor.
- Wires follow a predictable path: vertical from outlets and switches, then horizontal near the top plate toward the panel.
- Most Minneapolis single-family homes were built before 1940. Many still have knob-and-tube wiring that limits what scanners can detect reliably.
- Minnesota homeowners can do their own electrical work on an owner-occupied single-family home, but a permit must be pulled before work starts.
- When in doubt, a service call costs far less than drywall repair and an insurance claim.
What Happens When You Drill Into a Live Wire
Drilling into a live wire does not always produce a dramatic spark. Sometimes the insulation nicks, the circuit keeps running, and an arc begins smoldering inside the wall. That arc can burn for hours before it reaches the surface.
In 2023, residential electrical fires caused 23,700 fires, 305 deaths, and 800 injuries in the United States. Knowing how to find electrical wire behind wall before you drill is the step that keeps a weekend project from becoming one of those statistics.
This guide covers the tools, the routing map, and the Twin Cities-specific wiring reality that makes this harder in older Minneapolis and St. Paul homes than in newer suburbs.
Is There a Tool to Trace Electrical Wires Behind Drywall?
Yes. A stud finder with AC wire detection mode is the most accessible option for homeowners. Dedicated wire tracers are more accurate but cost more. Both tools have limits you need to understand before you trust a single scan.
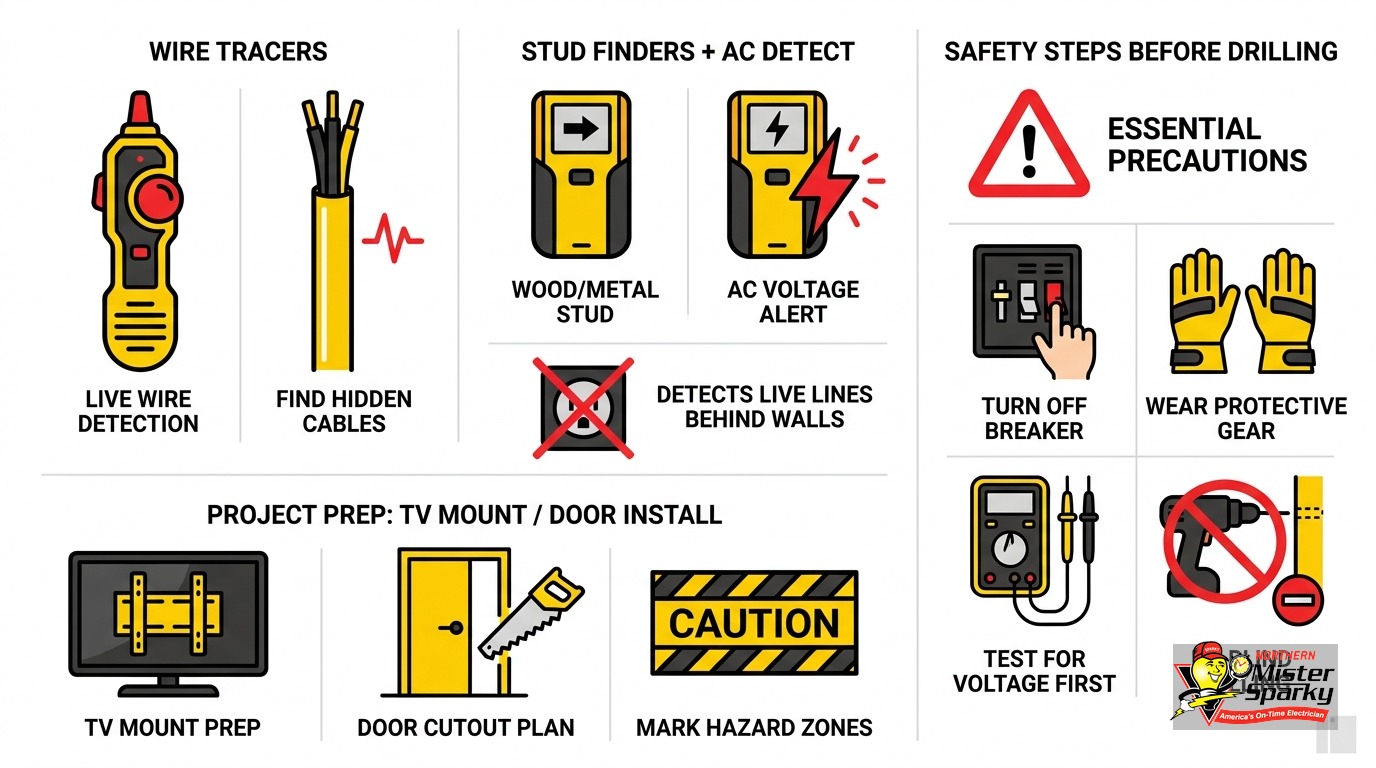
Stud finders with AC detection
These combination devices switch between stud, metal, and AC wire modes. In AC mode, the sensor detects the electromagnetic field from an energized conductor. The Bosch GMS120 is a common example, detecting AC wiring up to approximately 2 inches deep. It alerts with a tone or indicator light when it passes over a live wire.
Move the scanner slowly across the wall surface. Use a slight rubbing motion to discharge static. Static buildup causes false positives. Mark every alert with painter’s tape before drawing any conclusions.
One more technique worth knowing before you scan your actual work zone: run the scanner over a test area you can verify independently. Scan above an outlet you can already see. If the scanner consistently picks up the wire there, you have confirmed the tool is working correctly in your specific wall conditions.
Wire tracers (tone-and-probe kits)
A tone generator sends a signal into a wire from one end, usually at an outlet or junction box. A receiver probe then follows that signal along the wall surface. Wire tracers are better for tracking a specific circuit run. They require access to one end of the wire, so they work best when you can open a device box first.
Thermal cameras
A thermal imager detects heat from active circuits. These are standard in a licensed electrician’s kit. They are also useful for finding hot spots that indicate a failing connection. Most homeowners will rely on an AC stud finder or a tone tracer instead.
The shared limitation
Every detection method has a depth ceiling. Wires deeper than 2 inches, wires in metal conduit, or wires in old plaster-and-lath walls may not register at all. Plaster-and-lath adds at least an inch of wall depth on top of the drywall layer. Our guide to wiring in old plaster-and-lath homes explains the specific challenges those walls create for scanning and fishing.
Why Must the Circuit Be On to Scan and Off to Drill?
AC detection only works on an energized wire. The circuit must be live during the scan so the sensor can find it. After you have marked the wire locations, you turn the circuit off at the breaker before drilling. This is the step that most guides skip.
Here is the sequence in plain English:
- Leave the circuit on. Run your AC-detection scan across the planned drill area. Mark every wire alert with painter’s tape.
- Turn the circuit off at the breaker before you pick up the drill.
- Verify the circuit is dead with a non-contact voltage tester at the nearest outlet on that circuit.
- Drill only in spots your scan confirmed are clear.
Running the scan with the circuit already off defeats the detection entirely. The sensor has nothing to find. Drilling with the circuit still on means a scan miss could put you in direct contact with a live conductor.
Not every scanner alert means a wire. Metal pipes, HVAC ducts, and metal lath in older plaster walls can all trigger the AC detector. That is why marking with tape and scanning the same area multiple times matters. If you get a cluster of alerts in one spot across repeated passes, treat it as a wire. A single alert that does not repeat when you re-scan the same path may be a false positive, but do not ignore it entirely.
One more detail: confirm which circuit controls the wall where you are working. A living room wall may have two separate circuits feeding boxes on opposite sides of the same stud bay. If you are unsure which breaker to flip, turn off both.
Where Do Wires Actually Run Inside a Wall?
Wires follow a predictable grid. They run vertically from each electrical box, then horizontally near the top plate toward the panel or the next device on the circuit. Knowing this routing map tells you where to aim your scanner.
Standard box heights
Standard rough-in height for outlets is 12-18 inches above the finished floor (AFF), with switch boxes at 48 inches AFF (center of box). The wire exits the top or side of the box and runs up through the stud bay.
Horizontal runs near the top plate
Once a wire reaches the top plate, it turns horizontal and runs across the attic or top of the wall to the next stud bay or toward the panel. The 6-12 inches just below the ceiling line are the most wire-dense band in any wall. Treat that zone as a high-risk area until you have scanned it carefully.
Cross-runs between outlets
When two outlets on the same wall share a circuit, the wire often runs horizontally between them at outlet height. That run sits roughly 12-18 inches off the floor.
Switch legs above light switches
The wire controlling a ceiling fixture travels from the switch box up through the stud bay, across the top plate, and down through the ceiling to the fixture box above. If you are drilling near a light switch, scan both the wall directly above the switch and the ceiling nearby before putting a screw anywhere in that area.
Practical takeaway
Scan vertically above every outlet and switch in your work area before drilling anywhere nearby. The zone between switch height and the top plate is the most-traveled wire path in any wall. The middle section of the wall, between outlet and switch heights, has lower wire density. Lower is not zero. Always scan before drilling.
Does the NEC Protect Your Wires From Accidental Drilling?
Yes, when the wire runs close to the face of a stud. NEC 300.4(A)(1) requires a steel nail plate at least 1/16 inch thick when cable passes within 1.25 inches of the stud face. Older homes and DIY runs often skipped this requirement.
A standard 2x4 stud is only 3.5 inches wide. When a cable is bored through a hole that drifts even half an inch off center, it can fall within the threshold that triggers the nail plate requirement. When the plate is there, your drill bit hits steel first. You feel the resistance and stop.
When the plate is missing, there is no warning. This happens in homes where wiring predates the nail plate code, where a DIY run skipped the step, or where a wall was opened and the wire was rerouted without replacing the plate.
This is one of the clearest reasons that permits and inspections exist. An inspector verifies plates are in place before the wall is closed. Without that inspection on record, you have no guarantee the protection is there.
If you are adding a new outlet or running a new dedicated circuit, our guide on dedicated circuits for appliances covers what current code requires for new work, including the protection rules that apply to each cable run.
What If Your Twin Cities Home Has Knob-and-Tube Wiring?
Knob-and-tube wiring runs as two separate conductors, not a sheathed cable. Standard cable-tracing tools may not detect it reliably. You need to know what era your home was built in before trusting any scan result from an AC stud finder.
A large share of single-family parcels in Minneapolis were built many decades ago. Knob-and-tube (K&T) wiring was the construction standard through roughly 1950. In neighborhoods like Longfellow, Northeast Minneapolis, and St. Paul’s East Side, it is still active in a large share of homes.
K&T runs individual conductors separately, connected to ceramic knobs and threaded through ceramic tubes at wall penetrations. There is no sheath, no ground wire, and no cable to trace as a unit. An AC stud finder can still detect an energized K&T hot conductor if it is close to the surface. But it will not show you both conductors as a paired run. A scan hit on one side of a stud bay does not mean the return conductor is there too. That gap in detection coverage is exactly where an overconfident drill press causes a fire.
Homes built between 1965 and 1975 face a different issue: aluminum branch wiring. According to the CPSC, homes wired with aluminum branch circuits are 55 times more likely to have a connection reach fire-hazard conditions than copper-wired homes. Aluminum wiring requires specific aluminum-rated devices and connectors throughout. Our post on aluminum wiring dangers and how to fix them explains what that means for a Twin Cities home in that build era.
If you are not sure what type of wiring is in your walls, open an outlet cover on an exterior wall and look at the cable entering the box. NM cable (Romex) is flat or round with a printed label. K&T has no sheath: you will see individual wires entering through ceramic tubes. If you see K&T, call a licensed electrician before drilling near that circuit.
How Do You Know If You Hit a Wire With a Screw?
You usually know right away. The screw feels like it punched through something unexpected, the lights or outlet on that circuit go dead, or you see a spark at the tip. The dangerous version is when nothing obvious happens at first.
Here is what each scenario means:
- The breaker trips immediately. This is the best-case outcome. Overcurrent protection worked. Do not reset and keep drilling. Turn off the circuit, remove the screw, and have the wire inspected before closing the wall.
- You see a spark or smell burning at the screw. Stop immediately. Cut power to the circuit. Do not assume the arc extinguished itself inside the wall.
- Nothing happens at first. This is the scenario that leads to fires. A partial nick in wire insulation may not trip the breaker right away. It can arc intermittently behind the drywall for hours.
One common mistake: homeowners reset a tripped breaker without investigating, then reset it again when it trips a second time. Two trips on the same circuit in the same day are not a coincidence. They are a symptom. The circuit that controlled the outlet you were working near could also power lights, a refrigerator, or a sump pump. Tracing the problem now is far easier than tracing it after more devices are affected.
If you have any reason to believe you clipped a wire, call a licensed electrician before using that circuit again. Our post on how to find an electrical short in your home walks through what that diagnosis looks like.
Do not patch the drywall before the wire is inspected. An open wall now is far cheaper than a tear-out later.
How Do You Find a Bad Wire in Your House?
A bad wire announces itself through symptoms: flickering lights, a breaker that trips under normal load, a burning smell near an outlet, or a wall surface that feels warm to the touch. Tracing it means isolating the affected circuit and testing connections from the panel outward.
Here is the practical sequence for a homeowner:
- Identify the circuit. Which breaker controls the affected area? Our electrical panel labeling guide walks through the process if your panel is not clearly marked.
- Check every GFCI outlet on that circuit. A tripped GFCI upstream knocks out power to all outlets downstream. Press the reset button on every GFCI outlet in the area before assuming a wiring fault. See our outlet troubleshooting guide for the full process.
- Inspect accessible connections. Outlet boxes, junction boxes, and panel terminations are where connections fail most often. Loose wire nuts, oxidized terminals, and heat-discolored insulation are all visible with the cover off.
- Call for help when the fault is inside the wall. Tracing a fault inside finished drywall requires specialized testing or opening the wall. Our home wiring repair service handles this diagnosis daily.
The most important thing here: do not keep resetting the breaker and using the circuit while you troubleshoot. A repeating trip is the panel telling you something is wrong with the load or the wire itself. Treat it that way.
What Are the Minnesota Permit Rules for Homeowner Electrical Work?
Minnesota homeowners can do their own electrical work on an owner-occupied single-family homestead, but the permit must be pulled before work starts. Condos, duplexes, rental units, and manufactured housing are not eligible and require a licensed electrician.
The Minnesota Department of Labor and Industry is explicit on timing: starting work before the permit is issued triggers an investigation fee on top of the normal permit cost. Pull the permit first.
Minnesota adopted the 2026 NEC, effective August 17, 2026. Permits pulled on or after that date must comply with the 2026 edition. If you are adding an outlet or a new circuit, the required protection type and wiring method may differ from what was installed in your home a decade ago.
A permit also protects you at resale. Unpermitted electrical work can flag in a home inspection and become a negotiating point that costs more than the permit would have. Our post on unpermitted electrical work and what it means when buying a home in Minnesota covers how that plays out in a real transaction.
A permit requires an inspection. That inspection confirms nail plates are in place, connections are correct, and the work is safe before the wall goes back up. Skip it, and that uncertainty follows the house.
When to Call a Licensed Electrician Instead
Some wall-drilling projects have a clear stopping point. Here are the ones where calling first is the smarter move:
- You cannot identify what wiring type is in the wall. Pre-1950 Twin Cities homes often have a mix of K&T, early Romex, and DIY additions. Scanning an unknown mix produces unreliable results.
- You are adding a circuit, not just drilling a pass-through hole. Routing new wire through finished walls, connecting at the panel, and pulling a permit is a multi-step job. Our team handles it in one visit.
- The wall is adjacent to a bathroom or kitchen. These areas have specific GFCI requirements and code rules about outlet placement near water sources. A wire scan does not tell you whether the protection is configured correctly.
- You found K&T or aluminum wiring. Both require specific handling. K&T often needs full replacement for insurance compliance. Our post on knob-and-tube wiring replacement in Minnesota covers your options.
- You want to add an outlet in a finished wall. Adding an outlet to a finished wall involves fishing wire through existing framing. Done incorrectly, it creates code violations that surface at inspection or resale.
- You are planning to run wire underground to a shed or detached garage. Burial depth and conduit rules differ completely from interior wall work. Our guide on how deep to bury electrical wire in Minnesota covers what the 2026 NEC requires for those projects.
Northern Mister Sparky is locally owned and operated in the Twin Cities. We are America’s On-Time Electrician(R), and every job is backed by the UWIN(R) 100% satisfaction guarantee. If you are not sure what is behind your walls, call us at 763-200-5956 or book online. We will be there on time and give you a straight answer.
Frequently Asked Questions
How do you find a short circuit in a wall? +
Need an electrician now?