
Home Tanning Bed Electrical Requirements: Circuit Guide
Key Takeaways
- Read the nameplate and manual first. They set the voltage and amperage for your bed.
- A bed runs on either 120V or 240V. Never guess which one you have.
- Plan on a dedicated breaker for the bed. Shared circuits may trip.
- Do not plug a bed into a dryer outlet through an adapter. The breaker may be larger than the bed’s cord can handle.
- Wire gauge must match along the whole circuit. A heavy cord spliced to thinner wire is a red flag.
- Minnesota moved to the 2026 National Electrical Code (NEC) for permits filed on or after Aug. 17, 2026.
- Ask your electrician about permits before work starts. We handle that part for you.
What a Home Tanning Bed Needs From Your Electrical System
The label on your bed sets the rules. It gives the voltage and the amperage, and your circuit, breaker, wire, and receptacle must match both.
Most home beds need a dedicated circuit. Some run on 120V. Many run on 240V. The bed decides which one, not the outlet that happens to be nearby.
We are Northern Mister Sparky, a locally owned and operated electrician serving the Twin Cities. We install these circuits, and we want yours done right the first time.
Every bed is different, and nothing here replaces your manufacturer’s manual. Use this guide to understand the job, then let a licensed electrician confirm the details.
How Many Amps Does a Tanning Bed Pull?
It depends on the model, so check the nameplate or manual for the exact number. Common home circuits for these beds are 15 or 20 amps, and larger beds can need more. Never size a circuit from a forum post.
The label wins because two beds can look alike and draw very different loads. Lamps, fans, and the facial tanner all add up. The manufacturer tested the bed and printed the result.
One source lists common pairings for home beds. Treat them as a way to understand the range, not a replacement for your label. According to AC Works, the pairings look like this:
- A 120V bed with 16 lamps or fewer pairs with a 15-amp breaker and a NEMA 5-15R receptacle.
- A 120V bed with more than 16 lamps pairs with a 20-amp breaker and a NEMA 5-20R receptacle.
- A bed with any number of lamps can pair with a 20-amp breaker and a NEMA 6-20R receptacle.
That last pairing is the 240V option. It is common for beds with many lamps.
Watts equal volts times amps. Take a made-up example: a bed that draws 16 amps at 240V uses 3,840 watts. That is far more than a typical living room outlet can supply. It is an illustration only, not a real bed’s rating.
If you feel unsure, stop and call us. A wrong guess can mean tripped breakers or hot cords.
How Do You Size the Circuit and Breaker?
Size the circuit from the nameplate. Start with the voltage and amps printed on the bed. Then pick a breaker, wire, and receptacle that all match or exceed that rating and fit the manual. Your electrician applies the current code margins to finish the job.
Think of the circuit as a chain. Every link must handle the load. The chain includes:
- The breaker in your panel.
- The wire inside the wall.
- The receptacle on the wall.
- The cord and plug on the bed.
The smallest link becomes the weak point. Wire that is too thin can overheat, and a breaker that is too large will not protect it. That is why guessing is risky.
Step 1: Read the label
Find the nameplate on the bed. Write down the voltage, the amps, and the plug type. Check the manual for the recommended breaker size too.
Step 2: Confirm the voltage
AC Works notes that the voltage is 120V or 240V. It says to find it in the bed’s manual or product tags. Do not assume. A 240V bed will not work properly on a 120V circuit, and the reverse can damage the bed.
Step 3: Pick the breaker
The breaker protects the wire, so it must match the wire size in the wall. Our guide on wire gauge and breaker size explains how the two pair up.
A 240V circuit uses a double-pole breaker, which takes two slots in your panel. If your panel is full, we can often fix that. Full panels are common in older Twin Cities homes.
Step 4: Pick the wire
The wire gauge must match the breaker. Thicker wire carries more current safely. We choose the gauge from the breaker size and the distance between the panel and the bed.
Step 5: Pick the receptacle
The receptacle must match the bed’s plug. More on that next.
What Receptacle Should a Tanning Bed Use?
Use the receptacle that matches the plug on your bed. For many 240V home beds, that is a NEMA 6-20R on a 20-amp circuit. Never change a plug to fit an outlet. Change the outlet to fit the bed, and only if the rating allows it.
NEMA is the group that standardizes plug and outlet shapes. The numbers tell you the voltage and amps. An “R” at the end means receptacle, the outlet in the wall.
A few shapes you may run into:
- NEMA 5-15R: the standard household outlet. It is 120V and 15 amps.
- NEMA 5-20R: a 120V, 20-amp outlet. It has a small sideways slot.
- NEMA 6-20R: a 240V, 20-amp outlet. It has two flat blades set sideways.
Each shape is built so the wrong plug will not fit. That is a safety feature, and forcing a plug or swapping ends defeats it.
Want to see how outlet types differ? Our guide on 240V outlet installation for dryers and ranges covers the larger 240V shapes in your home.
Can You Plug a Tanning Bed Into a Dryer Outlet?
No, we do not recommend it. An adapter from a dryer outlet to a tanning bed plug puts a larger breaker behind a cord that may be rated lower. If the cord or bed has a fault, the breaker may not trip in time. Install a proper dedicated circuit instead.
The shortcut is common because a dryer outlet is already 240V. It looks easy. It is not.
AC Works lists the NEMA 10-30R, the old three-prong dryer outlet, and the 14-30R, the newer four-prong one, as receptacles it sells adapters for. Both sit on 30-amp circuits. A bed rated for a 20-amp circuit then runs behind a 30-amp breaker.
The breaker is there to protect the wire. A 30-amp breaker will let a cord carry more current than a 20-amp rating allows, so the cord can overheat before the breaker trips. That is also why the adapter approach fails a careful inspection.
There are other reasons to skip the adapter:
- Your dryer still needs that outlet.
- A tanning bed in a bedroom or basement may sit far from the laundry area.
- Adapters add another connection that can loosen or heat up.
- Home insurers and inspectors do not like them.
Need a dryer outlet explained or converted? See our post on 3-prong to 4-prong dryer outlet conversion. Just keep the dryer outlet for the dryer.
Why Wire Gauge Mismatches Cause Trouble
Wire gauge must stay consistent with the breaker along the whole run. Splicing a heavy cord to thinner branch wire creates a weak link. The thin wire becomes the part that overheats. It is a real failure mode, and we see versions of it in Twin Cars homes.
Here is a case from the web. A reader on Ask the Electrician described a bed that kept failing. The bed’s cord was 8 gauge at the plug but spliced to 12 gauge at the breaker box. The author flagged this as a possible wiring error.
Lower gauge numbers mean thicker wire, so 8 gauge is much heavier than 12 gauge. When a heavy cord feeds a thin run, the thin part sets the limit.
That page does not give a full sizing method, but it shows the problem well. A splice at the panel end is a place where heat, loose strands, and bad connections hide.
Signs of a bad connection or mismatch include:
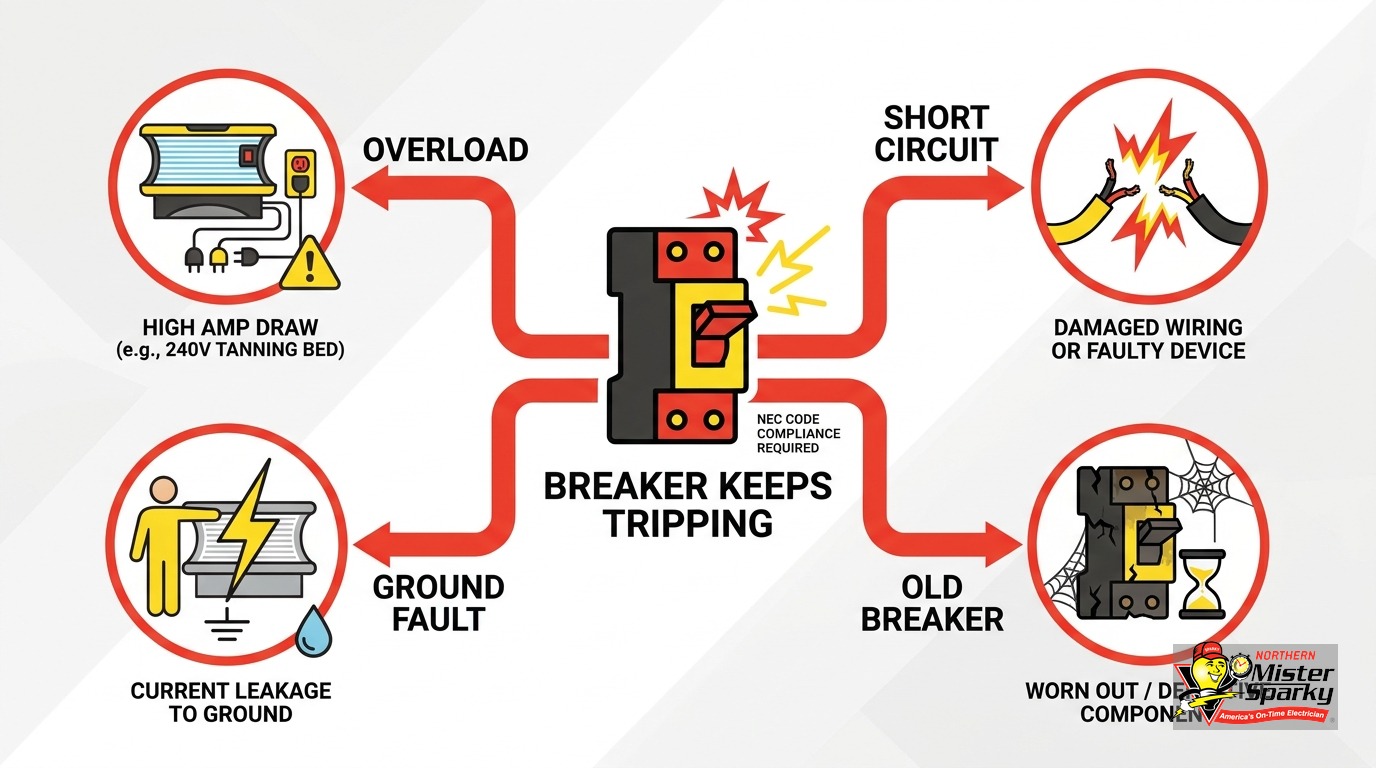
- The breaker trips for no clear reason.
- The plug or outlet feels warm.
- You smell something hot or like burning plastic.
- Lamps flicker or the bed shuts off mid-session.
- Discoloration shows on the outlet face.
If you see any of these, unplug the bed and stop using it. Our post on burning smells from outlets or breakers explains what to do next.
We never splice a bed’s cord to mismatched branch wire. We run the correct gauge from the panel to a proper receptacle, and the bed plugs in like any other appliance.
How Do You Wire Up a Tanning Bed?
A licensed electrician wires a tanning bed by confirming the label, running a dedicated circuit from the panel, and installing the matching receptacle. They then test the circuit before you plug in. Homeowners should not open the panel themselves. The steps below show what the work involves.
Here is how we approach it:
- Confirm the specs. We read the nameplate and manual. We note the voltage, amps, and plug shape.
- Check the panel. We look at open slots and the load on your service. Our guide on electrical panel out of breaker slots covers what happens when there is no room.
- Plan the route. We map the path from the panel to the bed location. Basements, spare bedrooms, and finished garages all need different routing.
- Pull any needed permit. We handle the paperwork. More on that below.
- Install the breaker and wire. We use the right gauge and a dedicated breaker. The bed gets its own circuit.
- Mount the receptacle. We match the NEMA type to your plug.
- Test the circuit. We check voltage, grounding, and connections before you plug anything in.
- Schedule the inspection. If the work requires it, we book it and meet the inspector.
Why dedicated? AC Works notes that manufacturers suggest each bed get its own breaker, because a shared circuit may trip. A dedicated line keeps lights, a space heater, or a vacuum from fighting the bed for power.
If the new circuit pushes your panel too far, we may suggest a larger fix, such as a subpanel or a full upgrade. We can walk you through panel upgrade options and financing for larger jobs. You get the numbers before any work begins.
What Does the NEC Say, and Which Edition Applies in Minnesota?
The National Electrical Code (NEC) sets the safety rules for home wiring. Minnesota adopted the 2026 NEC, effective Aug. 17, 2026. Permits filed before that date followed the 2023 NEC. Permits filed on or after it follow the 2026 NEC. Today, new permits follow the 2026 edition.
The Minnesota Department of Labor and Industry (DLI) publishes this. Per the Minnesota Board of Electricity, the board adopted the 2026 NEC with an effective date of Aug. 17, 2026. Exams move to the 2026 NEC starting Sept. 8, 2026. The page also notes that Chapter 1315 of the Minnesota State Building Code adopts the NEC.
Two points matter for you:
- The date your permit is filed decides the edition. That is the rule on the DLI page.
- The page lists no state amendments. So the NEC itself is the main reference.
We will not quote specific NEC section numbers here. Code language is dense, and numbers shift between editions. Your electrician checks the current text for your exact job.
The code covers how branch circuits get sized, how receptacles must be rated, and how wires get protected. All of it rests on one idea: the whole chain must handle the load safely.
Want a plain-English look at recent changes? Read our post on NEC code changes for Minnesota homeowners. It covers the earlier edition, and the 2026 update builds on it.
Can a Homeowner Do Electrical Work in Their Own Home?
Minnesota has rules that affect what homeowners may do on their own property. The details depend on the work and the permit. The state’s homeowner page does not spell out who may do the work. Check with the DLI before you start, or hire a licensed electrician.
Weigh the risk honestly. A 240V circuit carries enough power to cause serious injury. Panel work is the most dangerous part. Even with the main breaker off, parts of the panel stay live.
We cover this in more depth in our post on the homeowner electrical permit exemption in Minnesota. Read it before you plan any DIY work.
We lean toward a pro for a tanning bed, for these reasons:
- The load is large. A 240V circuit is not a lamp swap.
- Mistakes hide. A loose lug or bad splice can work for weeks before it fails.
- Insurance matters. Unpermitted or poor work can cause trouble at claim time or when you sell.
- Warranty matters. Some bed makers expect a proper install.
Our post on DIY electrical dangers explains the risks in more detail.
We are locally owned and operated, and we live in these neighborhoods too. We would rather you call us than watch a rushed project go wrong.
Do You Need a Permit for Tanning Bed Wiring?
A new circuit usually involves a permit and an inspection in Minnesota. The state’s homeowner page does not say whether a permit is required for a given job. Confirm with the DLI or your local building office. If you hire us, we handle the permit and inspection.
Here is how the process works, based on the state pages.
For homeowners
Per the DLI homeowner permit page, homeowners apply for electrical permits online and must create an account. Before you file or schedule an inspection, check the electrical inspector directory for the Authority Having Jurisdiction (AHJ). That is the office in charge of your address.
- If the AHJ is “State,” you file with the state.
- If it is “Local,” you contact your city or township.
After the permit is issued, you have 10 days to pay additional fees. That page lists no fee amounts, so ask before you budget.
Many Twin Cities cities use state inspection. Do not assume, though. Confirm through the AHJ directory for your exact address.
For contractors
Contractors follow a related path. According to the DLI contractor permit page, contractors file through the iMS system at ims.dli.mn.gov. The inspection path is one of three:
- Contract inspection areas: you contact the inspector.
- Virtual inspection eligible: you self-schedule.
- State inspector-assigned: you use the “Ready for Inspection” process.
We know which path applies in the cities we serve, so you do not have to guess.
For an overview of how permits work here, see our guide to the electrical permit in Minnesota. It covers when permits come up and what inspectors look for.
Work done without a permit can cause problems when you sell or file an insurance claim. Our post on unpermitted electrical work and home purchases in Minnesota explains why.
What to Check Before You Buy or Move a Used Bed
A used bed can come with surprises. Before you buy, confirm the label is readable and the manual is available. Ask the seller what circuit it ran on. Then have an electrician review the setup before you move it into your home.
Use this checklist:
- Find the nameplate. Make sure it is legible and shows voltage and amps.
- Get the manual. If it is missing, ask the maker for a copy.
- Inspect the cord and plug. Look for cracks, burn marks, or repairs.
- Ask about prior problems. Frequent tripping is a warning sign.
- Avoid unknown splices. If the cord has been cut and joined, walk away or have it checked.
- Plan the location. Know where the bed will sit and how far it is from your panel.
Distance matters. A long run from the panel can require thicker wire, which adds cost. Knowing the route lets us give you a firm price.
Think about the room too. A tanning bed sits in a closed space and gives off heat. Room cooling and ventilation are separate from the electrical work. For those, our sister company Northern One Hour HVAC is the right call.
A basement room may have damp spots. Our post on flooded basement electrical safety in Minnesota is worth a read if your lower level has ever taken on water.
Planning a Whole Room, Not Just One Circuit
Many people set up a tanning room the way they would a home studio. The bed is one load of several. Lights, fans, a sound system, and a small fridge may all want power.
Our guide to home recording studio electrical requirements in Minnesota shows how we think about a room full of gear. The same ideas apply here:
- Give the big load its own circuit.
- Keep the other outlets on separate circuits.
- Plan for the future so you do not run out of capacity.
If you plan to add more later, tell us now. Running extra capacity while the walls are open costs less.
Why Homeowners Call Northern Mister Sparky
We are a locally owned and operated Twin Cities electrician, backed by the national Mister Sparky franchise. We serve homeowners in Minneapolis, St. Paul, Bloomington, Brooklyn Park, Woodbury, Blaine, Maple Grove, Plymouth, and nearby.
Here is what you can expect:
- We show up on time. We are America’s On-Time Electrician(R).
- We stand behind our work. Our UWIN(R) 100% satisfaction guarantee is our promise to you.
- We explain the job in plain English. No jargon, no malarky.
- We handle permits and inspections. You do not have to learn the state system.
- We talk financing for larger jobs. If your bed needs a panel upgrade or subpanel, we go over your options up front.
A tanning bed is a fun addition to a home. A proper circuit keeps it from becoming a fire risk.
Ready to Plan Your Tanning Bed Circuit?
Bring the bed’s model number and a photo of the nameplate. We will confirm the voltage and amps, check your panel, and give you a clear plan and price.
Call 763-200-5956 or book online. We will get you scheduled fast and get the circuit done right.
Frequently Asked Questions
Does a tanning bed need its own breaker? +
Does every home tanning bed need 240V? +
Who can size the circuit if my bed has no clear label? +
Need an electrician now?